Ingredients:
- Cream Cheese Layer:
- 250g (1 cup) cream cheese
- 60g (4 tbsp) unsalted butter
- 100 ml milk
- 6 egg yolks
- 60g (4 tbsp) cake flour
- 20g (2 tbsp) cornstarch
- 1 tsp vanilla extract
- A pinch of salt
- Meringue:
- 6 egg whites
- 120g (10 tbsp) caster sugar
- 1/2 tsp cream of tartar or lemon juice
Instructions:
- Prepare the Baking Pan:
- Preheat your oven to 160°C (320°F). Line the bottom of a square or round 8-inch pan with parchment paper.
- Place the pan in a larger tray and prepare for a water bath.
- Make the Cream Cheese Batter:
- In a heatproof bowl, melt the cream cheese, butter, and milk over a double boiler. Stir continuously until the mixture is smooth and combined.
- Remove from heat, and let it cool slightly before adding in the egg yolks one by one, mixing thoroughly after each addition.
- Sift in the cake flour and cornstarch, and mix gently until well combined. Add the vanilla extract and a pinch of salt.
- Make the Meringue:
- In a separate, clean bowl, beat the egg whites with cream of tartar (or lemon juice) until frothy.
- Gradually add the caster sugar, continuing to beat until stiff peaks form. Be careful not to over-whip the meringue, as you want a glossy, stable meringue that holds its shape.
- Combine the Mixtures:
- Fold the meringue into the cream cheese mixture in three parts. Use a spatula and fold gently in a figure-8 motion to avoid deflating the batter.
- Ensure the batter is smooth and fully combined, without any lumps.
- Bake in a Water Bath:
- Pour the batter into the prepared pan. Tap the pan gently on the counter to release any large air bubbles.
- Place the baking pan inside the larger tray. Carefully pour hot water into the larger tray until it reaches halfway up the sides of the cake pan (water bath method).
- Bake at 160°C (320°F) for 25 minutes, then reduce the oven temperature to 140°C (285°F) and bake for an additional 55 minutes to 1 hour, or until the top is golden and the cake is set with a slight jiggle in the middle.
- Cool Gradually:
- Turn off the oven and leave the cheesecake inside with the door slightly ajar for 30 minutes to cool slowly. This prevents the cake from deflating too quickly.
- Once cooled, remove the cheesecake from the pan and refrigerate for at least 4 hours or overnight for the best texture.
- Serve:
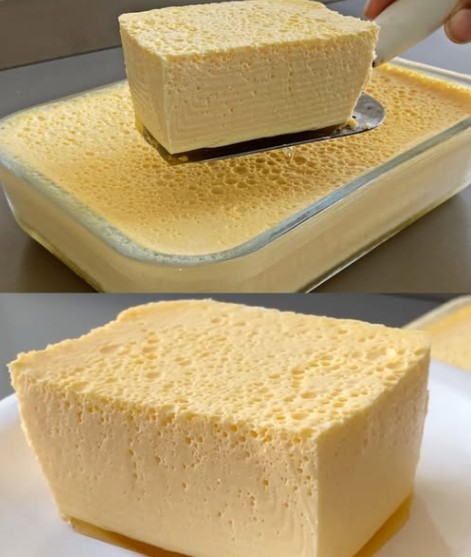
- Once fully chilled, slice the cheesecake into squares or wedges. It should be light, fluffy, and melt-in-your-mouth, just like the image.
Tips for Success:
- Make sure your meringue is stiff but not over-beaten.
- Always use a water bath to ensure even baking and to prevent cracking.
- The cake will shrink slightly as it cools; this is normal for this style of cheesecake.
- Storage Tips:
- Refrigeration:
- Wrap the cheesecake tightly with plastic wrap or store it in an airtight container to prevent it from absorbing any odors from other foods in the fridge.
- Keep it refrigerated at all times, and only take it out right before serving.
- Freezing (Optional):
- If you want to store it for a longer period, you can freeze the cheesecake. Wrap it tightly in plastic wrap, followed by aluminum foil, and place it in a freezer-safe container or ziplock bag.
- It can be stored in the freezer for up to 1 to 2 months.
- To thaw, place it in the refrigerator overnight and allow it to come to the desired temperature before serving.
- Quality Considerations:
- Over time, the cake’s airy and fluffy texture may become denser, and the taste can become slightly stale after the 3-5 day window.
- For the best experience, it’s recommended to consume it fresh within the first 2-3 days.
- Let me know if you need more info!
This recipe will give you a delicate, airy, and smooth texture with a slight bounce—perfect for a dessert like the one in your picture! Let me know if this matches what you’re looking for or if you want something else.