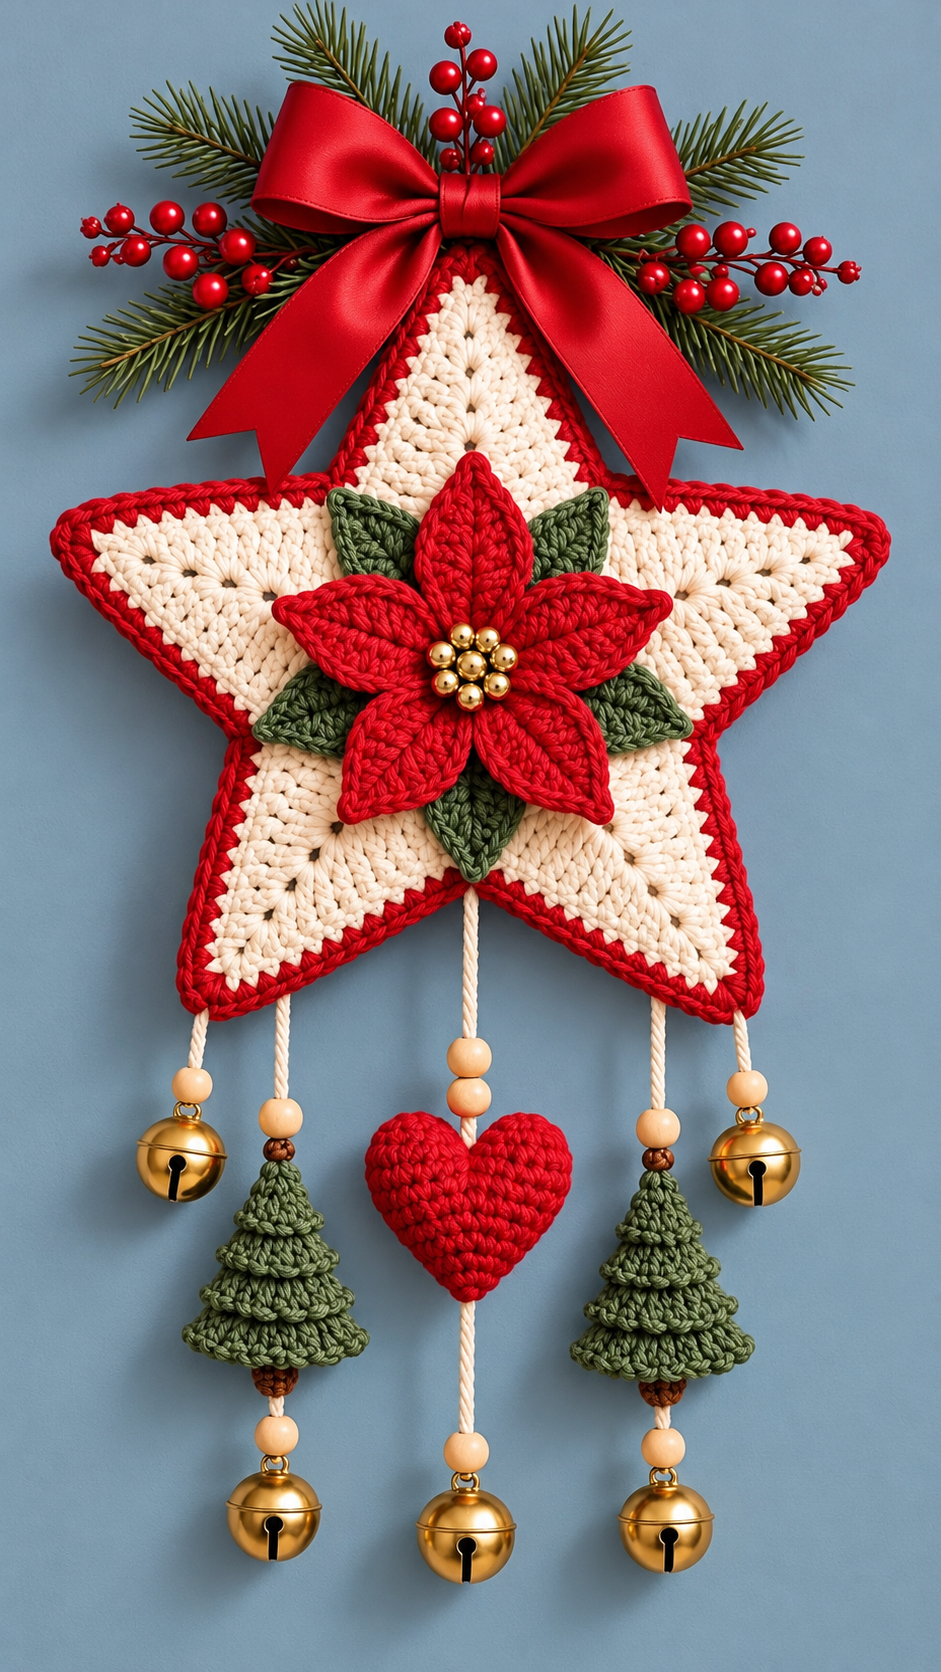

Skill Level: Intermediate Terminology: US Crochet Terms Finished Size: Approximately 12–14 inches (30–35 cm) wide, excluding hanging decorations Design: Five-pointed cream star with red edging, 3D poinsettia flower, green leaves, miniature Christmas trees, a red heart, and golden bells.
This beautiful handmade Christmas decoration combines a textured crochet star with festive hanging ornaments. It is perfect for Christmas wall décor, door decorations, or handmade holiday gifts.
This is an original pattern inspired by the reference photo. Some stitch details and proportions are approximated.
1. Materials
- Cream cotton or acrylic yarn
- Christmas-red yarn
- Sage-green yarn
- Small amount of brown yarn
- 3.5 mm or 4 mm crochet hook
- Yarn needle and scissors
- Polyester stuffing
- 6 small golden bells
- Small wooden beads
- 7–9 decorative golden beads for the flower center
- Red satin ribbon
- Artificial pine branches and red berries
- Optional stiffening spray
2. Crochet Abbreviations
| Abbreviation | Meaning |
| MR | Magic Ring |
| CH | Chain |
| SC | Single Crochet |
| HDC | Half Double Crochet |
| DC | Double Crochet |
| TR | Treble Crochet |
| SL ST | Slip Stitch |
| ST | Stitch |
| INC | Increase |
| DEC | Decrease |
| FO | Fasten Off |
CH 3 counts as a DC where indicated.
3. Main Cream Crochet Star
Make two identical star panels if you want a sturdy, double-layered decoration.
Step 1: Crochet the Center
Using cream yarn:
Round 1: Make a magic ring. CH 3, work 14 DC into the ring. Join with SL ST. (15 DC)
Round 2: CH 3, DC in the same stitch, then work 2 DC in every remaining stitch. Join. (30 DC)
Round 3: CH 3, DC in each stitch around. Join. (30 DC)
Step 2: Create Five Star Points
Divide the 30 stitches into five groups of six.
Each point is worked separately in turning rows.
Row 1: Join yarn to the first stitch of a six-stitch section. CH 2 (does not count as a stitch), HDC in each of the six stitches. Turn. (6 HDC)
Row 2: CH 1, HDC2TOG, HDC in next 2 stitches, HDC2TOG. Turn. (4 HDC)
Row 3: CH 1, HDC in each stitch. Turn. (4 HDC)
Row 4: CH 1, HDC2TOG twice. Turn. (2 HDC)
Row 5: CH 1, HDC2TOG. FO. (1 HDC)
Repeat for the remaining four sections.
For longer points, add one even row between decrease rows. This creates a more elongated Christmas star.
Step 3: Red Border
Join red yarn at any point.
Work SC evenly around the entire star, placing 3 SC at each outer tip and using decreases at the inner valleys to prevent bunching.
Complete one or two rounds for a bold red outline.
If making two panels, place them wrong sides together and join with red SC stitches around the edge. Add a little stuffing or a thin felt insert before closing for a firm finish.
4. Red 3D Poinsettia Flower
The center of the star features a raised red poinsettia with five pointed petals.
Flower Center
Using red yarn:
Round 1: MR, 5 SC. Join.
Round 2: Work 2 SC in each stitch. (10 SC)
Make Five Petals
Each petal is worked separately over two center stitches.
Row 1: CH 1, 2 SC. Turn.
Row 2: CH 1, 2 SC in each stitch. (4 SC)
Row 3: CH 1, SC, HDC, HDC, SC. Turn.
Row 4: CH 1, SC2TOG twice. (2 stitches)
Row 5: CH 1, SC2TOG. FO.
Repeat for five petals, joining the yarn at the base of the next petal.
For a larger poinsettia, add extra even rows before decreasing.
Work a round of SC around each petal for a neat, defined edge.
Sew the finished flower to the middle of the cream star.
Golden Flower Center
Sew 7–9 small golden beads into a tight circular cluster in the middle of the poinsettia.
Secure each bead firmly.
5. Green Poinsettia Leaves
Make five leaves using sage-green yarn.
Row 1: CH 11.
Row 2: Starting in the second chain, work SC, HDC, 2 DC
