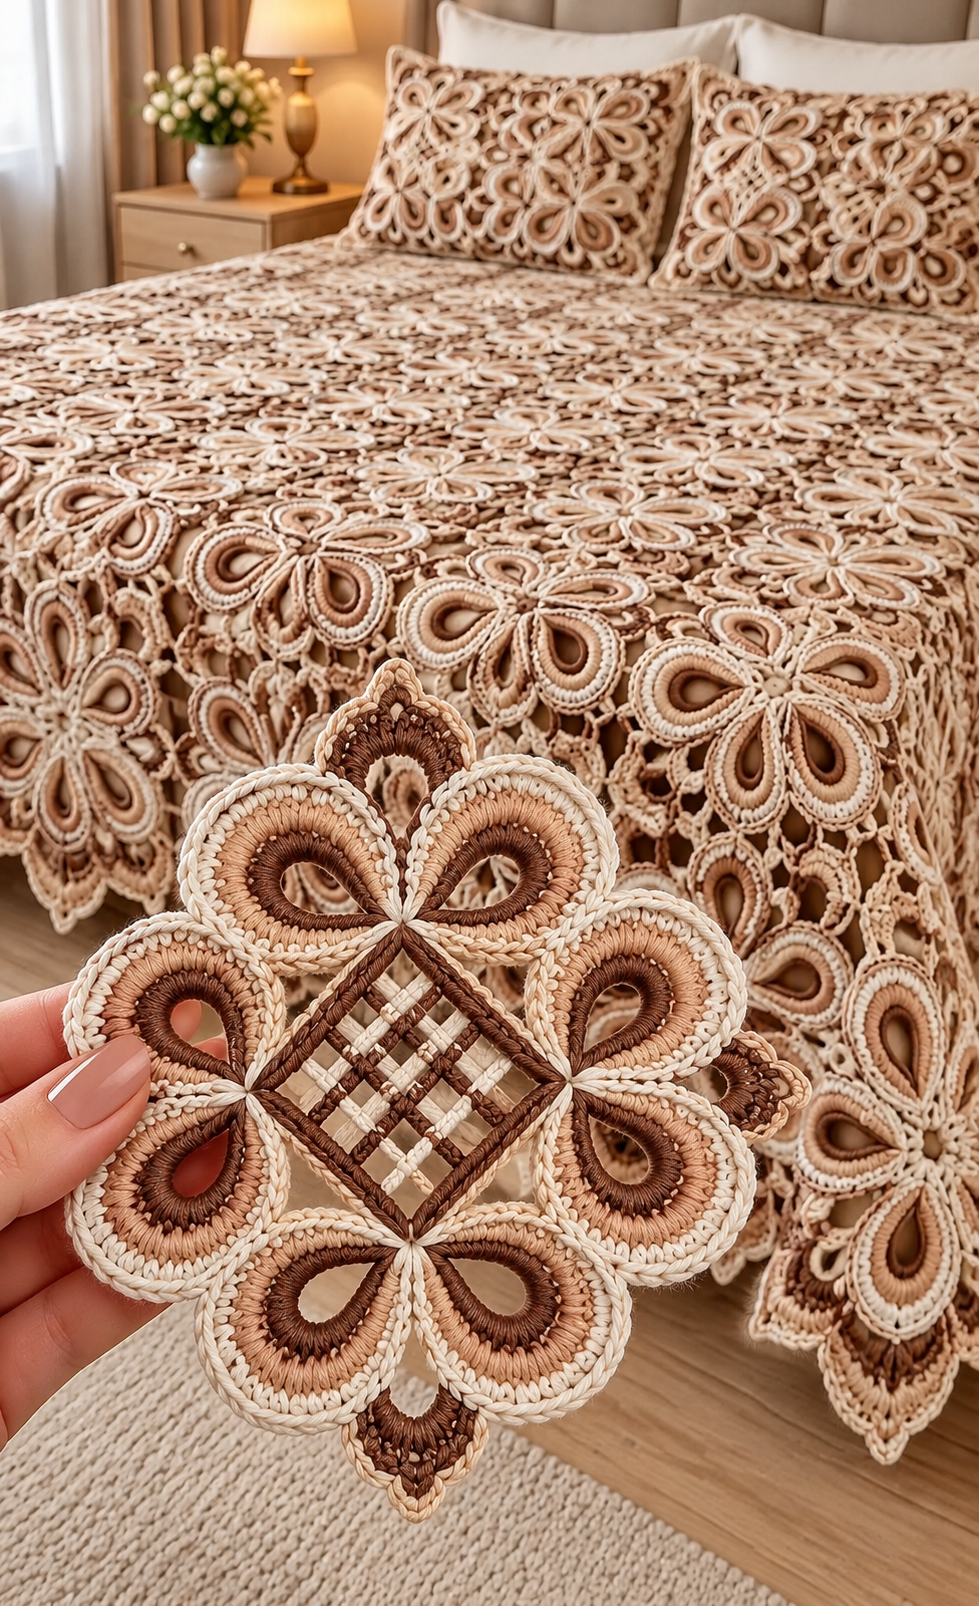

Skill Level: Intermediate to Advanced Technique: Raised Fan Stitch, Puff Stitch, Scalloped Motifs, Join-as-You-Go Crochet Finished Project: Queen-size bedspread with two matching pillow covers Colors: Sage Green and Warm Ivory
This beautiful crochet bedspread features overlapping ivory fan-shaped flowers surrounded by soft sage green scalloped borders. The matching pillow covers complete the elegant, handmade bedroom design.
Pattern note: This is an original, reconstructed pattern inspired by the photograph. The exact stitch construction cannot be verified from the image, so the instructions create a similar raised fan-and-scallop effect rather than an exact replica.
Materials
- DK or light worsted cotton-blend yarn
- Ivory yarn for the raised floral fans
- Sage green yarn for the outlines and joining
- 4 mm crochet hook (adjust to your yarn)
- Yarn needle
- Scissors
- Stitch markers
- Blocking pins and mat
- Two pillow inserts
Crochet Abbreviations (US Terms)
| Abbreviation | Meaning |
| CH | Chain |
| SL ST | Slip Stitch |
| SC | Single Crochet |
| HDC | Half Double Crochet |
| DC | Double Crochet |
| TR | Treble Crochet |
| FPDC | Front Post Double Crochet |
| BLO | Back Loop Only |
| ST | Stitch |
| SP | Space |
| YO | Yarn Over |
Part 1: Crochet the Ivory Fan Motif
Each fan is worked separately and attached to a green scalloped foundation.
Step 1 – Foundation Ring
Using ivory yarn:
- Make a magic ring.
- CH 3 (counts as the first DC).
- Work 11 DC into the ring.
- Pull the ring closed.
- Join with SL ST to the top of the beginning CH 3.
You should have 12 DC.
Step 2 – Create the Fan Foundation
- CH 4.
- Work 2 TR into the next stitch.
- Work 3 TR into each of the next 4 stitches.
- Work 2 TR into the next stitch.
- CH 4 and SL ST into the next stitch.
This produces a broad, curved fan section.
Step 3 – Raised Fan Texture
To imitate the thick, dimensional stitches in the photograph:
- Attach ivory yarn at the base of the fan.
- Work one elongated puff stitch around each treble crochet post.
- Keep the puff stitches close together.
- Work SC between the raised sections where necessary.
- Fasten off and weave in the ends.
Puff stitch: YO, insert hook into the designated space, pull up a long loop. Repeat 4 times in the same space, YO and pull through all loops, then CH 1 to secure.
Maintain an even height so the fan looks full and symmetrical.
Part 2: Sage Green Scalloped Border
Using sage green yarn:
Round 1
- Attach yarn to one lower corner of the fan.
- Work SC evenly along the first side.
- Work 2 SC into the upper corner.
- Continue around the curved fan edge.
- Work 3 SC at the center of the outer curve.
- Continue down the opposite side.
- Join with SL ST.
Round 2
- CH 1.
- Work SC in each stitch around.
- Add increases where needed to keep the outer edge flat.
- Join with SL ST.
Round 3 – Raised Corded Edge
- CH 1.
- Work reverse SC (crab stitch) around the outer edge.
- Keep the tension firm but not tight.
- Join and fasten off.
This creates the rounded sage-green outline that defines each ivory fan.
Part 3: Create the Four-Fan Floral Motif
The large motif in the foreground features four raised fan sections arranged like flower petals.
Step 1 – Center Foundation
Using sage green:
- Make a magic ring.
- CH 3 and work 11 DC into the ring.
- Join with SL ST.
- CH 3, DC in the same stitch.
- Work 2 DC into every stitch around.
- Join with SL ST.
You now have 24 stitches.
Step 2 – Create Four Attachment Points
- SC in the first stitch.
- CH 5.
- Skip 5 stitches.
- SC in the next stitch.
- Repeat around to form four evenly spaced chain loops.
Step 3 – Attach the Fans
- Position one ivory fan at each attachment point.
- Use sage green yarn to join the base of each fan to the center.
- Arrange the fans facing outward.
- Overlap the neighboring scalloped edges slightly.
- Sew or crochet the adjoining sections securely.
The finished motif should resemble a rounded four-petal flower with raised ivory fans and sage-green outlines.
Part 4: Crochet the Openwork Lace Between Fans
The small decorative spaces between motifs create the delicate lace texture.
Using ivory yarn:
Round 1
- Attach yarn between two neighboring fans.
- CH 5.
- SC into the adjacent fan edge.
- CH 5 and SC into the next attachment point.
- Continue around the motif.
Round 2
- Work (SC, CH 3, SC) into each CH-5 space.
- Repeat around.
- Join and fasten off.
These chain arches form the openwork connections.
Part 5: Join the Motifs into a Bedspread
The design works best when the fan motifs overlap in staggered rows, creating a continuous scalloped texture.
Joining method:
- Lay the finished motifs on a flat surface.
- Arrange them in staggered rows.
- Position neighboring scallops so they overlap slightly.
- Join corresponding green edge stitches using SL ST or mattress stitch.
- Connect open spaces with ivory CH-3 bridges.
- Continue until the desired bedspread size is reached.
Suggested Bedspread Dimensions
| Bed size | Approximate finished size |
| Twin | 170 × 220 cm |
| Full | 200 × 230 cm |
| Queen | 230 × 250 cm |
| King | 270 × 260 cm |
The number of motifs depends on the finished size of your blocked sample. For example, a motif with an effective joined width of 20 cm would require approximately 12 motifs across a 230 cm bedspread, with edge adjustments.
Part 6: Crochet the Scalloped Bedspread Border
Using sage green yarn:
Round 1: Work SC evenly around the entire bedspread, placing extra stitches at the corners as necessary.
Round 2: Repeat (SC, CH 5, skip 3 stitches) around the edge. Adjust the spacing to fit the existing stitches.
Round 3: Work 7 DC into each CH-5 space and SC between the shells.
Round 4: Work SC around each shell, adding an extra SC at the highest point to emphasize the scallop.
Round 5: Finish with reverse SC to create a defined, raised sage-green border.
Part 7: Matching Crochet Pillow Covers
The pillows in the reference image feature rows of smaller ivory fans with sage-green scalloped borders.
Pillow Front
- Crochet smaller fan motifs using the same stitch technique.
- Arrange them in horizontal, overlapping rows.
- Join the motifs along their green edges.
- Continue until the panel matches the pillow dimensions.
- Add a final scalloped border.
Pillow Back
- Crochet two rectangular panels using SC or HDC.
- Make the panels overlap by approximately 8–10 cm.
- Attach the back panels to the front along three sides and the outer edges of the fourth.
- Leave the overlapping opening accessible.
- Insert the pillow.
Finishing and Blocking
Weave in all yarn ends securely. Gently wet-block the finished motifs and bedspread, following the yarn care instructions. Shape each fan and scalloped edge while damp, then allow the crochet to dry completely.
For the final presentation, spread the bedspread evenly across the mattress, allowing the scalloped edges to drape over the sides. Arrange the matching pillows against the headboard.
Tips for a Professional Finish
- Use a consistent yarn thickness throughout the project.
- Keep the raised ivory puff stitches uniform in height.
- Avoid tightening the sage-green borders, which can distort the fans.
- Block a sample motif before calculating the total number required.
- Join motifs loosely enough to preserve the bedspread’s natural drape.
Final result: A luxurious sage-green and ivory crochet bedspread with layered floral fans, raised three-dimensional texture, delicate lace connections, scalloped edges, and coordinating pillow covers.
