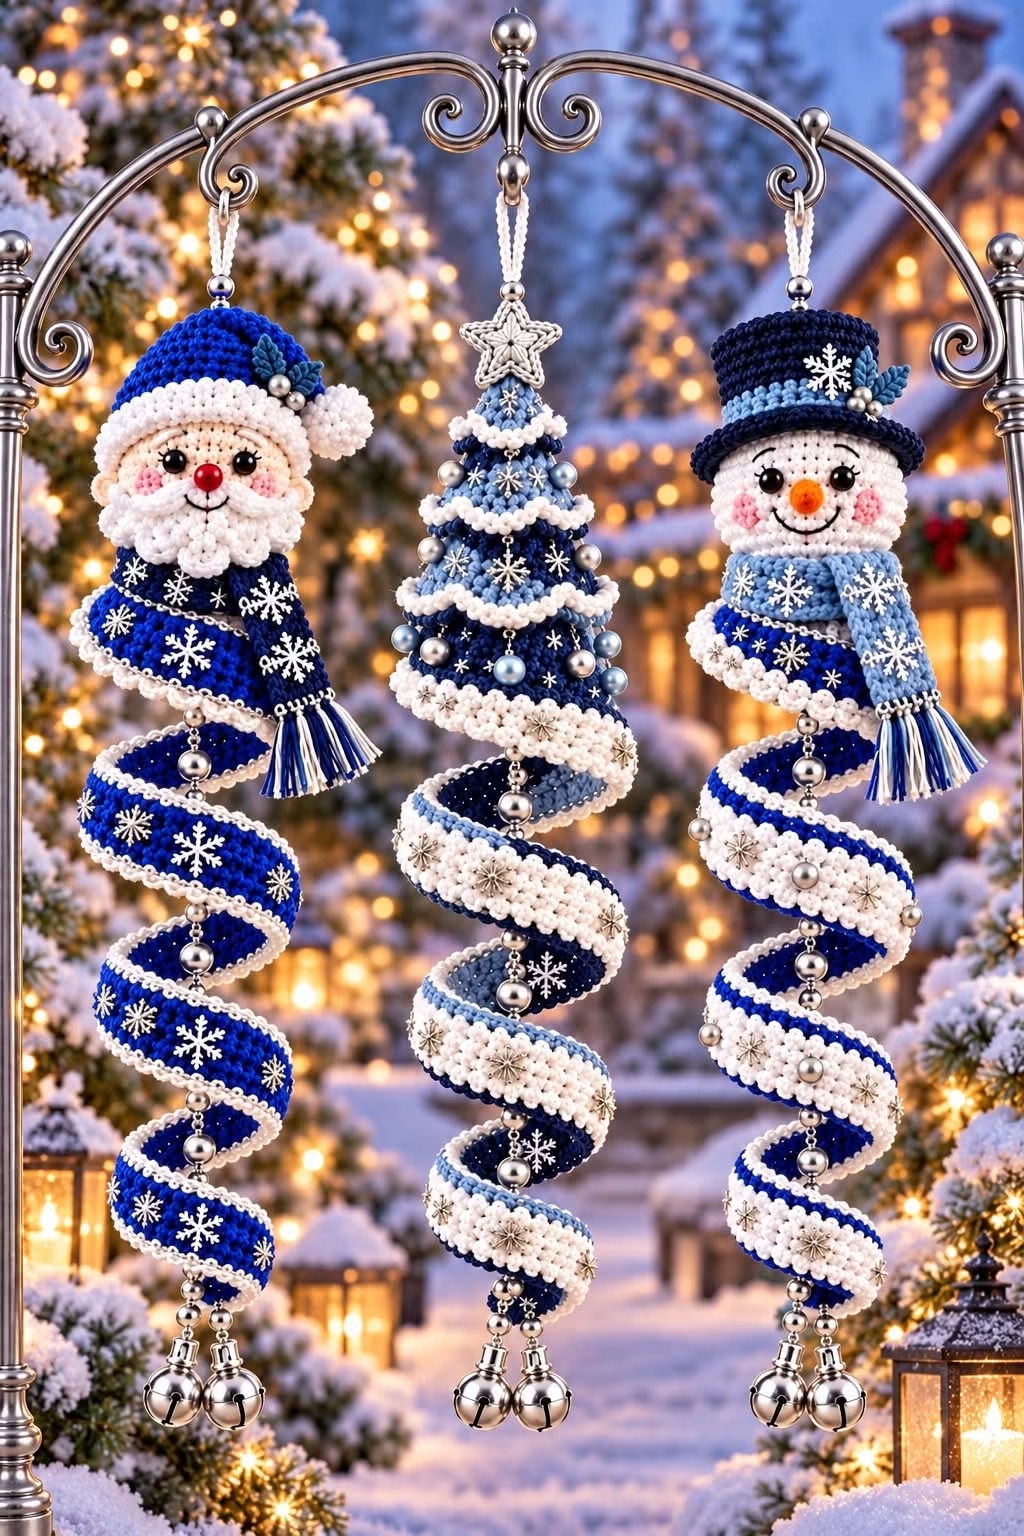

Materials
- DK cotton yarn: royal blue, navy, light blue, white, peach, pink, orange, and red
- 2.5–3 mm crochet hook
- Stuffing and yarn needle
- Black embroidery thread
- Flexible craft wire, pliers, and floral tape
- Strong hanging cord, silver beads, and bells
- Optional snowflake charms
Use embroidered eyes if making decorations for a home with young children. These ornaments are decorations, not toys.
US abbreviations
ch = chain; sc = single crochet; hdc = half double crochet; dc = double crochet; sl st = slip stitch; inc = 2 sc in one stitch; dec = invisible decrease; MR = magic ring.
Work amigurumi parts in continuous rounds. Numbers in parentheses are stitch counts.
1. Spiral body — make three
With royal blue or navy:
Row 1: Ch 101. Sc in the second chain from the hook and each chain across. (100)
Rows 2–6: Ch 1, turn, sc across. (100)
For a striped version, work rows 1–2 navy, rows 3–4 light blue, and rows 5–6 white.
White edging: Join white at one corner. Sc evenly around the strip, working 3 sc in each corner. On the second round, work sl st in the next stitch, ch 2 repeatedly for a small decorative edge. Fasten off.
Optional snowy edge: Instead of the second edging round, repeat sc in the next stitch, ch 3, sl st into that same stitch, sc in the next stitch.
Embroider small snowflakes before shaping: make three crossing straight stitches, then add short branches to each arm.
Shape the spiral
- Cut two lengths of wire slightly shorter than the long edges.
- Fold each wire end into a closed loop and cover it with floral tape.
- Secure the wires underneath the two long edges with closely spaced whipstitches. Completely enclose the ends.
- Wrap the strip around a smooth cylinder approximately 7–9 cm wide.
- Remove the cylinder and gently stretch the coil into three or four open turns.
For longer ornaments, increase the foundation chain and keep the same strip width.
2. Central hanging cord
Use a strong cord long enough for the topper, spiral, and bottom bells, plus a hanging loop.
Thread silver beads onto it, securing their positions with knots. Stitch the spiral’s upper and lower ends securely to the cord, then add a discreet attachment at intermediate turns if needed. Attach two bells at the bottom.
The cord should carry the ornament’s weight.
3. Santa topper
Head — peach
R1: 6 sc in MR. (6)
R2: Inc around. (12)
R3: (Sc, inc) × 6. (18)
R4: (2 sc, inc) × 6. (24)
R5: (3 sc, inc) × 6. (30)
R6–10: Sc around. (30)
R11: (3 sc, dec) × 6. (24)
R12: (2 sc, dec) × 6. (18)
Stuff. Embroider eyes, pink cheeks, and a small smile.
R13: (Sc, dec) × 6. (12)
R14: Dec × 6. (6)
Fasten off and close.
Blue hat
R1: 6 sc in MR. (6)
R2: Sc around. (6)
R3: (Sc, inc) × 3. (9)
R4: Sc around. (9)
R5: (2 sc, inc) × 3. (12)
R6: (Sc, inc) × 6. (18)
R7: (2 sc, inc) × 6. (24)
R8: (3 sc, inc) × 6. (30)
R9–11: Sc around. (30)
Change to white.
R12–14: Sc around. (30)
Sew onto the head and add a white pompom.
Beard
With white, ch 13.
Row 1: Sc in the second chain and across. (12)
Row 2: Ch 1, turn, dec, 8 sc, dec. (10)
Row 3: Ch 1, turn, dec, 6 sc, dec. (8)
Row 4: Ch 1, turn, dec, 4 sc, dec. (6)
Row 5: Ch 1, turn, dec, 2 sc, dec. (4)
Work small picots around the sides and lower edge. Sew below the nose.
Moustache — make two: Ch 5; starting in the second chain, sl st, sc, hdc, dc. Sew the wider ends together beneath a small red yarn nose.
4. Snowman topper
Make the Santa head in white.
Carrot nose — orange
R1: 4 sc in MR. (4)
R2: Sc around. (4)
R3: (Sc, inc) × 2. (6)
Fasten off, lightly stuff, and sew in place. Embroider eyes, smile, and pink cheeks.
Navy top hat
R1: 6 sc in MR. (6)
R2: Inc around. (12)
R3: (Sc, inc) × 6. (18)
R4: (2 sc, inc) × 6. (24)
R5: Working in back loops only, sc around. (24)
R6–10: Sc around. (24)
R11: Working in front loops only, (sc, inc) × 12. (36)
R12: Sc around. (36)
Add a light-blue embroidered band and sew onto the head.
Scarf: With light blue, ch 41. Hdc in the third chain and across. Fasten off, add short fringe, and stitch around the base of the head.
5. Christmas tree topper
With navy:
R1: 6 sc in MR. (6)
R2: Sc around. (6)
R3: (Sc, inc) × 3. (9)
R4: Sc around. (9)
R5: (2 sc, inc) × 3. (12)
R6: Sc around. (12)
R7: (Sc, inc) × 6. (18)
R8–9: Sc around. (18)
R10: (2 sc, inc) × 6. (24)
R11–12: Sc around. (24)
R13: (3 sc, inc) × 6. (30)
R14–15: Sc around. (30)
R16: (4 sc, inc) × 6. (36)
R17–18: Sc around. (36)
Fasten off. Stuff lightly.
Base: Work rounds 1–6 of a flat circle, increasing by 6 stitches each round to reach 36 stitches. Sew into the tree opening.
Snow garlands: Make three white chains long enough to fit around the tree at different heights. Work sc, ch 2 along each chain, then sew them around the cone.
Star: In an MR, repeat ch 3, sc in the second chain from the hook, hdc in the next chain, sl st into the ring five times. Pull the ring closed and sew the star to the tip.
Add securely sewn silver beads and embroidered snowflakes.
6. Final assembly
Attach each topper firmly above its spiral. Run the suspension cord through the topper so the hanging loop supports the entire ornament. Conceal all yarn ends, check every bead and bell attachment, then hang and adjust the coils until they fall evenly.
