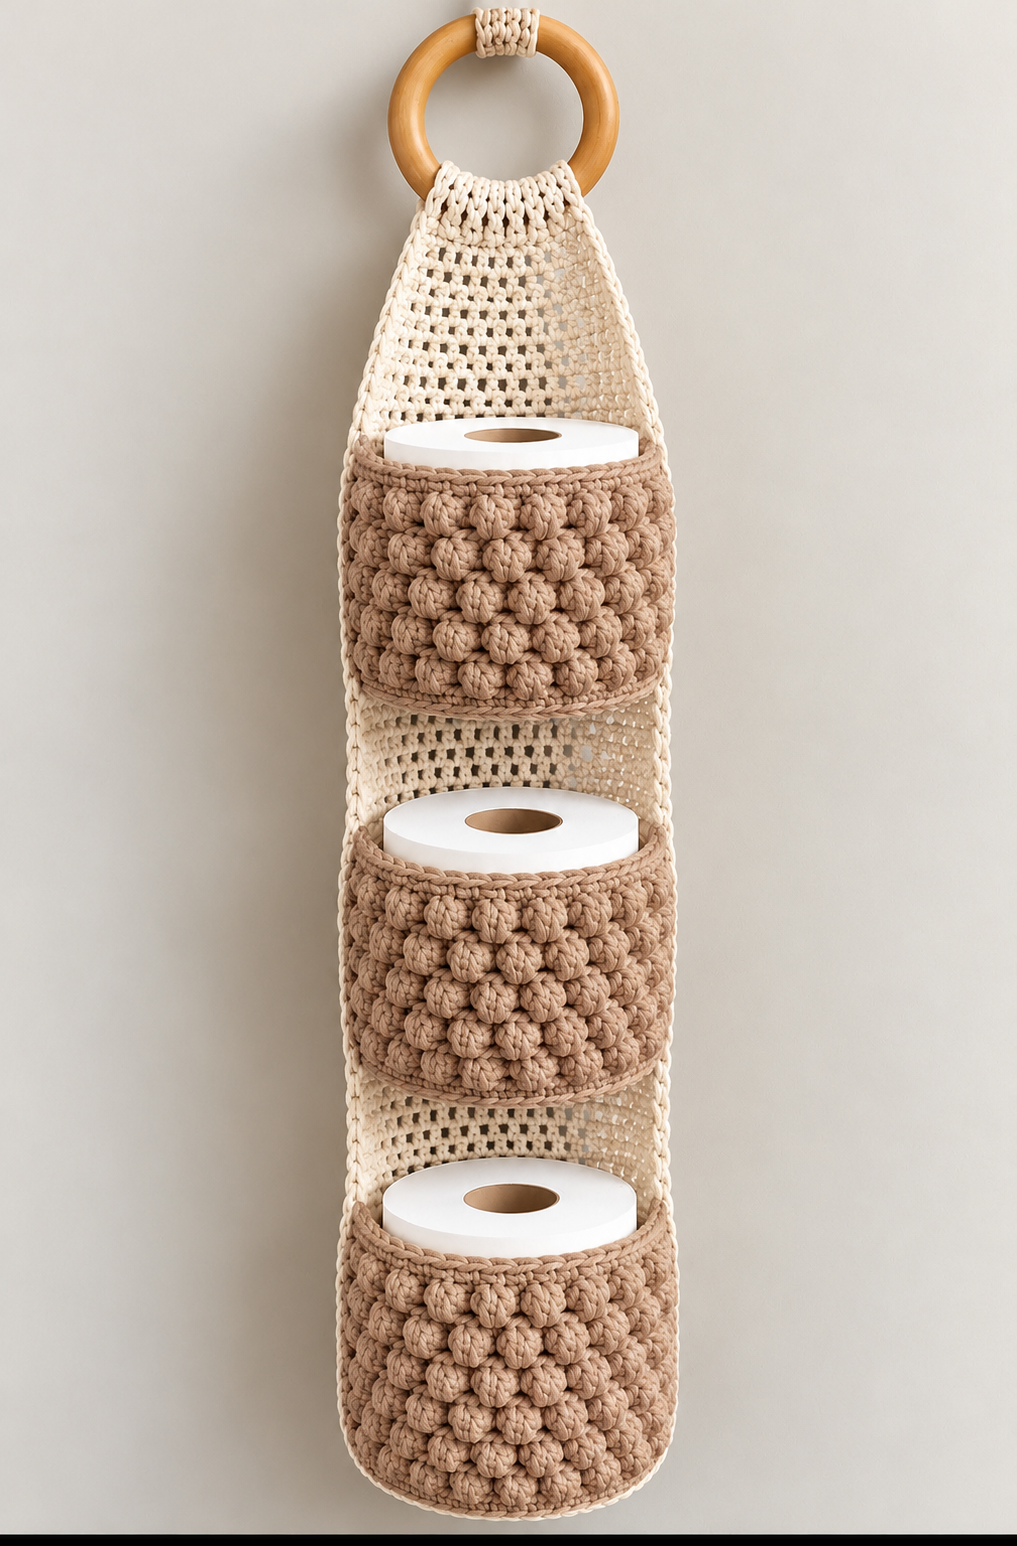

This beautiful three-tier crochet toilet paper holder features textured bobble-stitch pockets, a mesh backing, and a wooden hanging ring. It’s a practical bathroom organizer and a lovely handmade decoration!
This is a reconstructed pattern inspired by the photo, not the original designer’s verified pattern.
Materials
- 250–350 g yellow cotton yarn (worsted or chunky weight)
- 4.5–5 mm crochet hook (appropriate for your yarn)
- Wooden ring, approximately 8–10 cm diameter
- Yarn needle
- Scissors
- Stitch markers
- Three toilet paper rolls for sizing
Abbreviations (US Terms)
- CH – Chain
- SC – Single crochet
- DC – Double crochet
- HDC – Half double crochet
- SL ST – Slip stitch
- BO – Bobble stitch
- ST – Stitch
- REP – Repeat
Bobble stitch (BO): Work 5 incomplete double crochets into the same stitch, then yarn over and pull through all 6 loops on the hook.
Part 1: Crochet the Back Panel
The back panel supports all three storage pockets.
- CH 37.
- Row 1: DC in the 4th chain from the hook and across. (35 DC, counting turning CH)
- Row 2: CH 3, turn. DC in each stitch across.
- Row 3: CH 4, turn. Skip 1 stitch, DC in next stitch, CH 1. Repeat across to create a mesh pattern.
- Row 4: CH 3, turn. DC in each DC and chain space across.
- Repeat Rows 3–4 until the panel measures approximately 65–70 cm.
- Finish with two solid DC rows.
The panel should be approximately 20–23 cm wide. Adjust the starting chain to fit your toilet paper rolls.
Part 2: Make the Three Bobble-Stitch Pockets
Make 3 identical rectangular pocket panels.
Foundation: CH 39.
Row 1: SC in the second chain from hook and across. (38 SC)
Row 2: CH 1, turn. SC in each stitch.
Row 3: CH 1, turn. SC in first stitch, BO in next stitch, SC in next stitch. Repeat the alternating bobble pattern across.
Row 4: CH 1, turn. SC in every stitch.
Row 5: Repeat Row 3, staggering the bobbles for a fuller texture.
Rows 6–15: Repeat Rows 4–5.
Rows 16–17: SC across for a firm upper edge.
Fasten off, leaving a long tail for assembly.
Each pocket should measure approximately 23–26 cm wide and 12–15 cm tall, depending on yarn and tension.
Part 3: Attach the Pockets
- Lay the backing panel flat.
- Position the first pocket near the bottom.
- Sew the bottom edge of the pocket to the backing.
- Attach the side edges, leaving enough fullness to accommodate a toilet paper roll.
- Repeat for the second and third pockets.
- Leave approximately 5–7 cm between pockets, adjusting as necessary.
Important: Test each pocket with an actual toilet paper roll before sewing the sides completely. The pocket must curve outward to hold the roll securely.
Part 4: Attach the Wooden Ring
- Fold the top 5–7 cm of the backing panel around the wooden ring.
- Secure it using slip stitches or strong sewing stitches.
- Reinforce the attachment with additional yarn.
- Check that the ring supports the weight of three toilet paper rolls.
Part 5: Decorative Border
Work SC evenly around the exposed edges of the organizer.
For a thicker border, add a second round of reverse single crochet (crab stitch).
Weave in all loose ends and gently shape the pockets.
Final Result
You now have a beautiful hanging crochet organizer featuring:
- Three textured bobble-stitch pockets
- An airy mesh backing
- A natural wooden hanging ring
- Space for three toilet paper rolls
- A bright, cheerful bathroom decoration
Helpful adjustment: If your pockets are too narrow, increase the foundation chain by multiples of 2. If they are too shallow, add extra bobble-stitch rows.
This is a workable starting pattern, but the stitch counts and dimensions may need adjusting to reproduce the exact proportions shown in the image.
