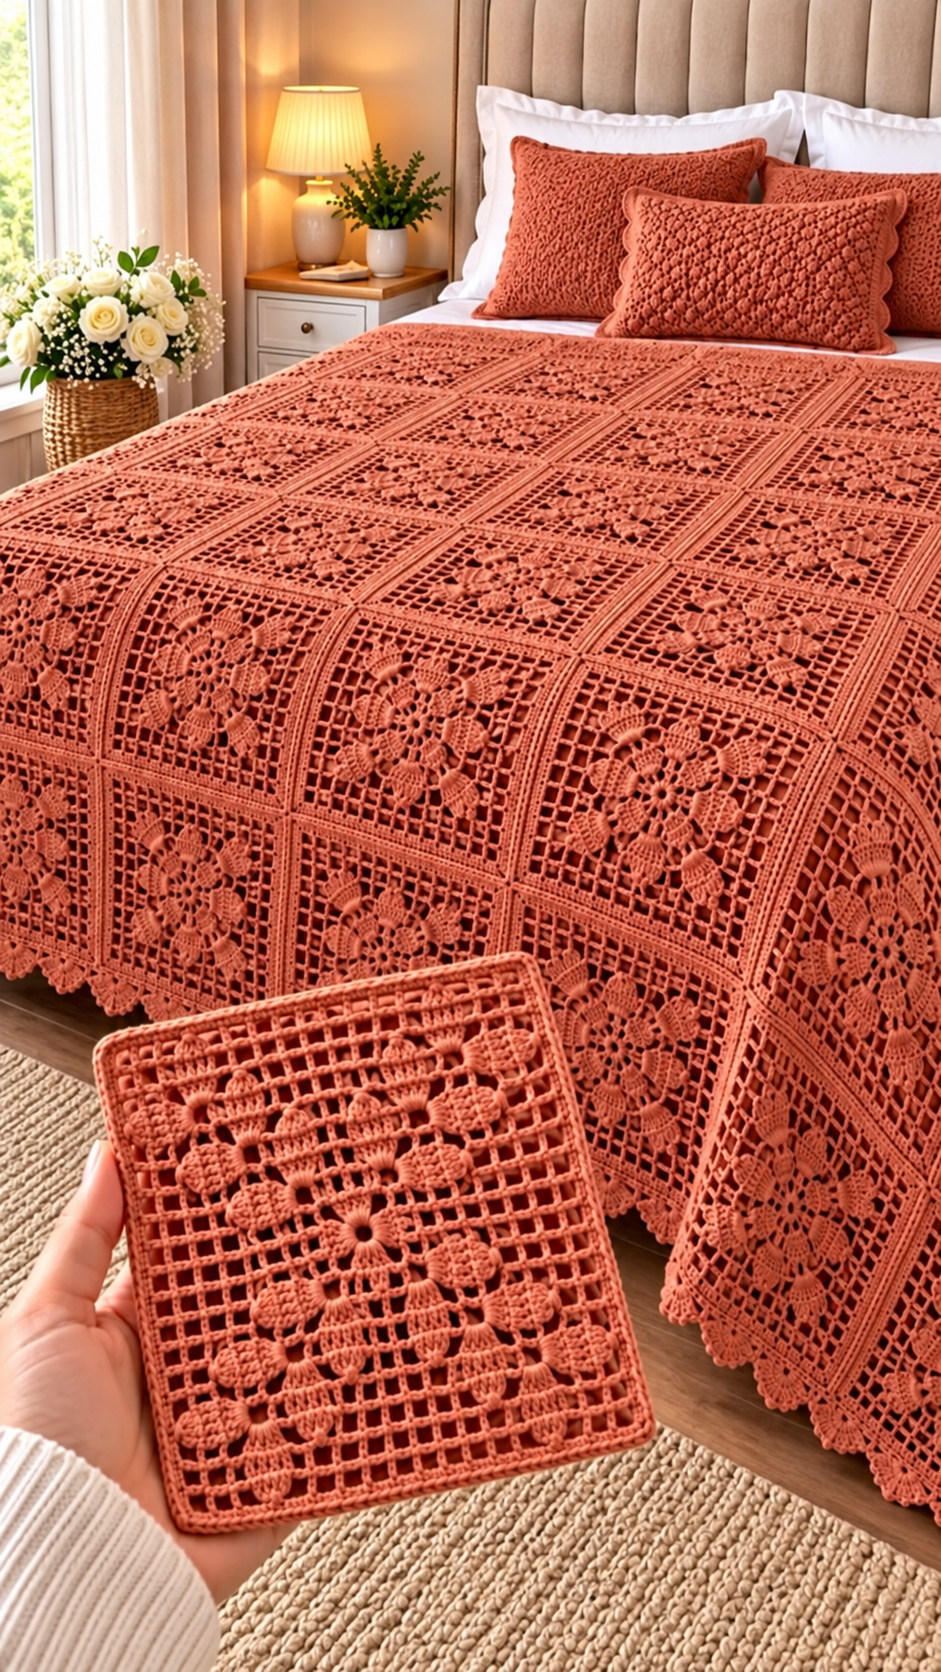

This elegant crochet bedspread features floral granny squares, an open mesh background, raised flower details, decorative joining borders, and matching crochet pillows.
The following is an original pattern inspired by the photograph. It recreates the overall floral lace appearance, although the exact stitch construction of the pictured blanket cannot be determined from the image alone.
Materials
- DK or light worsted cotton yarn in terracotta
- 3.5 mm or 4 mm crochet hook
- Yarn needle
- Scissors
- Stitch markers
- Measuring tape
Abbreviations (US terms): ch = chain, sl st = slip stitch, sc = single crochet, hdc = half double crochet, dc = double crochet, tr = treble crochet, sp = space, rep = repeat.
Part 1: Crochet the Center Flower
Round 1: Make a magic ring, ch 3 (counts as dc), work 11 dc into the ring. Join with sl st. (12 dc)
Round 2: Ch 1, sc in the first stitch, ch 3, skip the next stitch. Repeat around to create 6 chain-3 spaces. Join.
Round 3: Into each ch-3 space, work (sc, hdc, 3 dc, hdc, sc). Repeat around to form 6 flower petals. Join.
Round 4: Working behind the petals, attach yarn around the base of a petal, ch 5, and anchor with sc behind the next petal. Repeat to create 6 loops.
Round 5: In each ch-5 loop, work (sc, hdc, 5 dc, hdc, sc). Repeat around.
You now have a raised, two-layer floral center.
Part 2: Create the Open Mesh Square
Round 6: Attach yarn behind the flower. Ch 4, then work dc and ch-2 spaces around the flower, distributing 24 dc posts evenly. Join.
Round 7: Begin shaping the motif into a square. Establish four corner spaces at approximately equal intervals. Work (2 dc, ch 3, 2 dc) into each corner, and ch-2 mesh spaces between them.
Rounds 8–12: Continue working dc posts separated by ch 2 across each side. In every corner, work (2 dc, ch 3, 2 dc).
Maintain an even square shape, adding mesh spaces as the sides grow.
Round 13: Work sc evenly around the square, placing (sc, ch 2, sc) in each corner.
Round 14: Work one round of dc around the motif, placing (2 dc, ch 2, 2 dc) into each corner space.
Fasten off and weave in ends.
The mesh-round instructions are a flexible construction guide rather than a fully stitch-counted chart. Keep the same number of mesh openings on opposite sides so the squares join neatly.
Part 3: Add Raised Floral Details
To achieve the textured appearance in the reference, decorate the mesh with small bobble flowers.
For each bobble:
- Join yarn into a selected mesh space.
- Ch 3.
- Work 4 unfinished dc into the same space.
- Yarn over and pull through all loops.
- Ch 1 to secure.
- Fasten off and weave in ends.
Place the bobbles symmetrically around the central flower, creating a floral diamond design.
Part 4: Make the Full Bedspread
For an approximate 220 × 240 cm bedspread, use a square size of about 20 × 20 cm after blocking.
Squares across
11
Squares down
12
Total squares
132
Approx. finished size
220 × 240 cm
Block all squares to equal dimensions before joining.
Part 5: Join the Squares
Arrange the finished squares in rows.
Place two squares with wrong sides together. Using matching terracotta yarn, join through the corresponding edge stitches with slip stitches or single crochet.
Repeat across each row, then join the rows together.
For a flatter finish, use a mattress stitch with a yarn needle.
Part 6: Crochet the Scalloped Border
Round 1: Work sc evenly around the entire blanket, with 3 sc in each corner.
Round 2: Work dc around, increasing at corners as necessary to keep the fabric flat.
Round 3: Repeat (skip 2 stitches, 5 dc in next stitch, skip 2 stitches, sc in next stitch) along each side. Adjust spacing near corners.
Round 4: Work sc along the scalloped edge, placing additional stitches around each shell where needed.
Fasten off and weave in all ends.
Part 7: Matching Crochet Pillow Covers
Make two matching squares for each pillow face, or combine four smaller motifs into one panel.
Crochet a plain back panel using hdc rows, matching the dimensions of the front.
Join three sides with sc, insert a pillow form, and close the final side. Alternatively, add buttons for a removable cover.
Finishing
Gently wet-block the completed bedspread to open the lace mesh and define the floral details. Allow it to dry completely on a flat surface.
For the closest resemblance to the reference image, use a consistent terracotta shade, evenly sized squares, pronounced raised flowers, and a softly scalloped outer border.
Important: Make and measure one sample square before purchasing yarn for all 132 motifs. The final square size and yarn consumption will depend on your tension, yarn thickness, and any adjustments to the mesh rounds.
