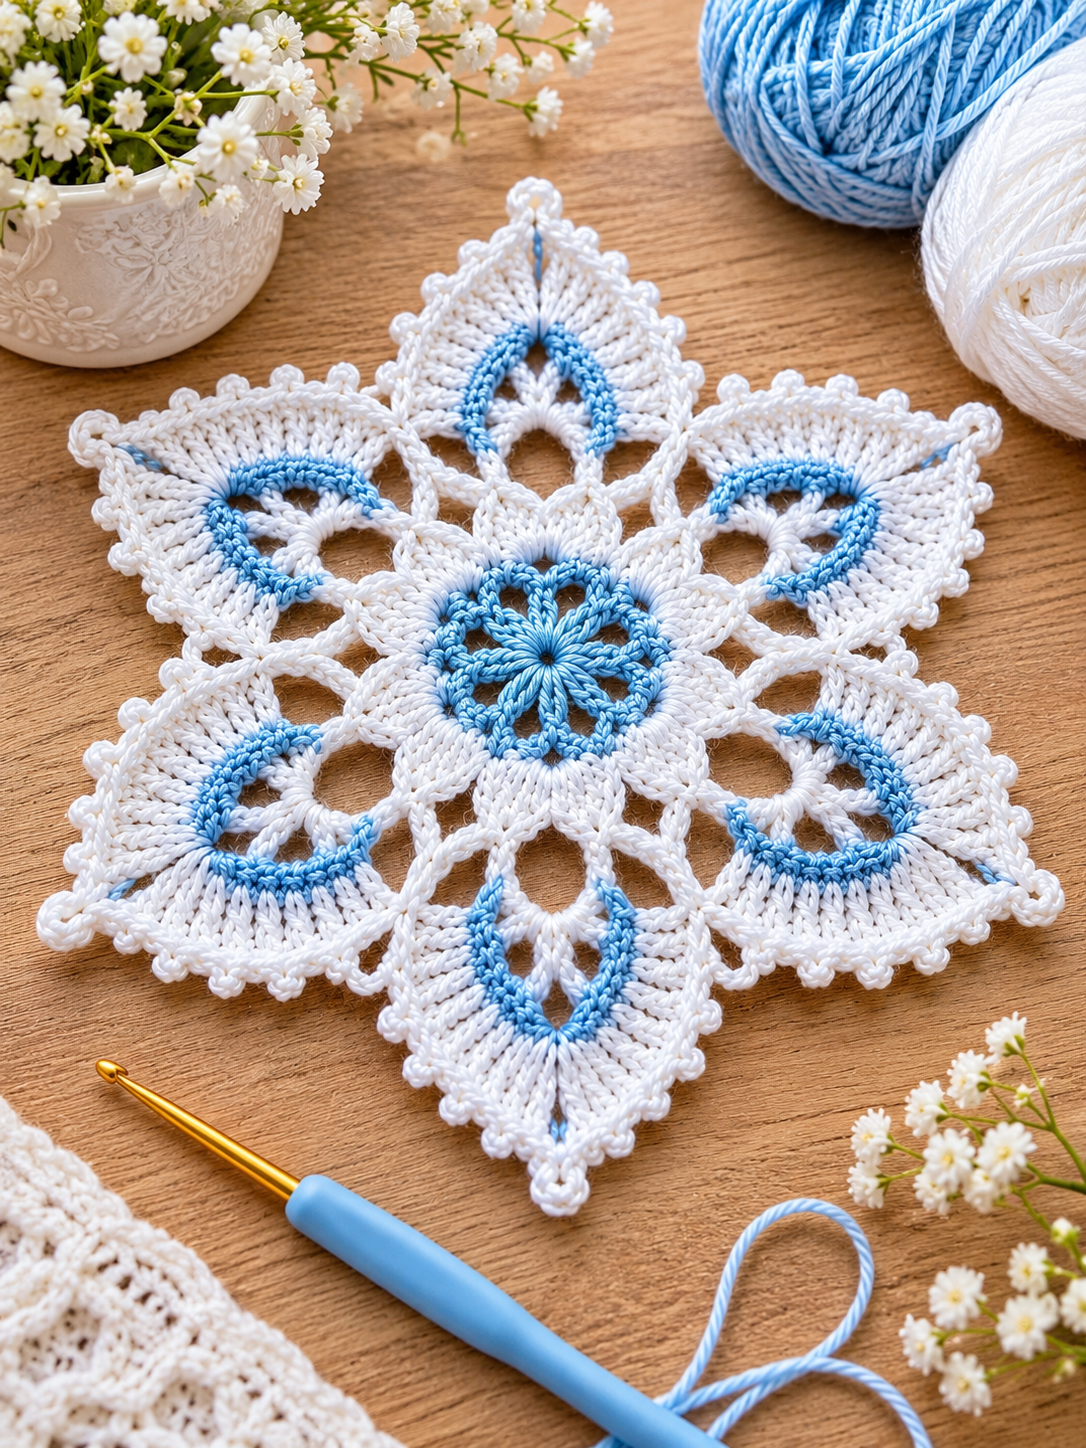

This elegant six-point crochet snowflake features a delicate floral center, beautiful baby-blue teardrop accents, white lacework, and a textured picot edging. Perfect for Christmas decorations, table centerpieces, wall hangings, or joining into a beautiful winter blanket.
Skill Level: Intermediate to Advanced Finished Size: Approximately 20–25 cm (8–10 inches), depending on yarn and hook size Construction: Worked from the center outward in joined rounds.
Note: This is a reconstructed pattern inspired by the photograph, not the original designer’s verified instructions. It aims to reproduce the same overall appearance, although some stitch counts and details may differ.
Materials
- White cotton yarn (sport or DK weight)
- Baby blue cotton yarn of matching weight
- 3.0 mm or 3.5 mm crochet hook
- Scissors
- Yarn needle
- Stitch markers
- Blocking pins and mat
Crochet Abbreviations (US Terms)
| Abbreviation | Meaning |
| MR | Magic Ring |
| ch | Chain |
| sl st | Slip Stitch |
| sc | Single Crochet |
| hdc | Half Double Crochet |
| dc | Double Crochet |
| tr | Treble Crochet |
| dtr | Double Treble Crochet |
| sp | Space |
| st | Stitch |
| rep | Repeat |
| picot | Ch 3, sl st into first chain |
| BLO | Back Loop Only |
Part 1: Baby Blue Floral Center
Round 1 – Foundation Ring
Using baby blue yarn:
- Make a magic ring.
- Ch 3 (counts as first dc).
- Work 17 dc into the ring.
- Pull the ring tightly closed.
- Join with a sl st to the top of beginning ch-3.
Total: 18 dc.
Round 2 – Open Floral Center
- Ch 1 and sc into the same stitch.
- Ch 3, skip 2 stitches.
- Sc into the next stitch.
- Repeat around until you have 6 chain-3 spaces.
- Join with a sl st.
Total: 6 open loops.
Round 3 – Raised Blue Petals
Work into each ch-3 space:
- Sc.
- Hdc.
- 3 dc.
- Hdc.
- Sc.
Repeat in all six spaces.
Join with a sl st and fasten off.
Result: A six-petal baby-blue flower.
Part 2: White Inner Petals
Round 4 – White Petal Foundation
Attach white yarn between two blue petals.
- Ch 4.
- Work 1 dc into the gap between the next two petals.
- Ch 4.
- Repeat around.
Join to the starting point.
Total: 6 chain-4 spaces.
Round 5 – White Raised Petals
Into each chain-4 space, work:
- 1 sc
- 1 hdc
- 3 dc
- 1 tr
- 3 dc
- 1 hdc
- 1 sc
Repeat around.
Join with a sl st.
This forms six white petals surrounding the blue center.
Part 3: Open Lace Connections
Round 6 – Decorative Chain Arches
Using white yarn:
- Sl st into the space between two white petals.
- Ch 7.
- Sc into the next space between petals.
- Repeat around.
- Join with a sl st.
Total: 6 chain-7 arches.
Round 7 – Structural Lace Framework
Work into each chain-7 arch:
- Sc into the arch.
- Ch 5.
- Sc into the same arch.
- Ch 5.
- Sc into the same arch.
- Ch 3 to bridge to the next arch.
Repeat around.
This creates the open lace structure that connects the central flower to the six outer points.
Part 4: Six Baby Blue Teardrop Motifs
Each of the six points is constructed individually. The following method creates the characteristic blue inner teardrop and surrounding white fan.
Step 1 – Blue Teardrop Foundation
Attach baby blue yarn to a chain-5 loop from Round 7.
- Ch 12.
- Sl st into the same anchoring point to form an elongated loop.
- Ch 1.
- Work 18 sc evenly around the loop.
- Join with a sl st.
Fasten off.
The resulting blue loop forms the curved interior of the teardrop.
Step 2 – White Inner Accent
Attach white yarn to the lower interior of the blue loop.
- Ch 3.
- Work 2 dc into the lower center.
- Ch 2.
- Work 3 dc into the same space.
- Fasten off.
This creates the small white decorative accent inside the teardrop.
Step 3 – White Outer Fan
Attach white yarn to the outside of the blue loop, near its base.
Work along the outer edge of the loop:
- 2 hdc.
- 3 dc.
- 5 tr.
- 3 dtr.
- Ch 3 and sl st into the first chain to create the pointed tip.
- Continue down the opposite side with 3 dtr, 5 tr, 3 dc, and 2 hdc.
Distribute these stitches evenly around the loop, using multiple stitches in selected base stitches to create a broad, flat fan.
Finish with a sl st.
Step 4 – Decorative Picot Edging
Using white yarn, work along the outer fan:
- Sc into the next stitch.
- Make a picot (ch 3, sl st into first chain).
- Sc into each of the next 2 stitches.
- Repeat the picot sequence along the fan edge.
- Work a slightly larger picot (ch 5, sl st into first chain) at the outermost point.
Fasten off and weave in the end.
Repeat Parts 4, Steps 1–4, for all six teardrop motifs.
Part 5: Joining and Shaping the Snowflake
To achieve the open, symmetrical shape:
- Arrange the six points evenly around the center.
- Use white yarn to make short chain-3 or chain-5 bridges between neighboring motifs wherever additional support is needed.
- Secure each bridge with a slip stitch or single crochet.
- Keep the joins loose enough that the lace lies flat.
- Check that all six points are evenly spaced.
For a more connected lace appearance, work an additional small chain loop between each pair of outer motifs.
Part 6: Blocking and Finishing
Blocking is essential for making this motif look like the photograph.
- Soak the finished snowflake in lukewarm water for approximately 10 minutes.
- Gently squeeze out excess water using a towel.
- Place the snowflake on a blocking mat.
- Pin all six points outward at equal distances from the center.
- Shape the blue teardrops into smooth curves.
- Open the white lace arches and straighten the picot edging.
- Allow to dry completely before removing the pins.
For a firmer Christmas ornament, apply a light fabric-stiffening solution before blocking.
Creative Uses
This snowflake motif can be used as a Christmas tree ornament, a decorative table centerpiece, a winter wall hanging, or a beautiful appliqué for blankets and cushions. You can also connect several motifs using small crochet chain bridges to create a larger lace table runner.
Color variations: Try ivory and gold for an elegant Christmas look, white and silver for a frosty winter theme, or blush pink and cream for a romantic decorative piece.
Important: Because the exact stitch structure cannot be fully determined from a single photograph, this is a workable starting design rather than a stitch-for-stitch reproduction. The outer fans and connecting chains may require adjustments to lie flat and match the reference.
