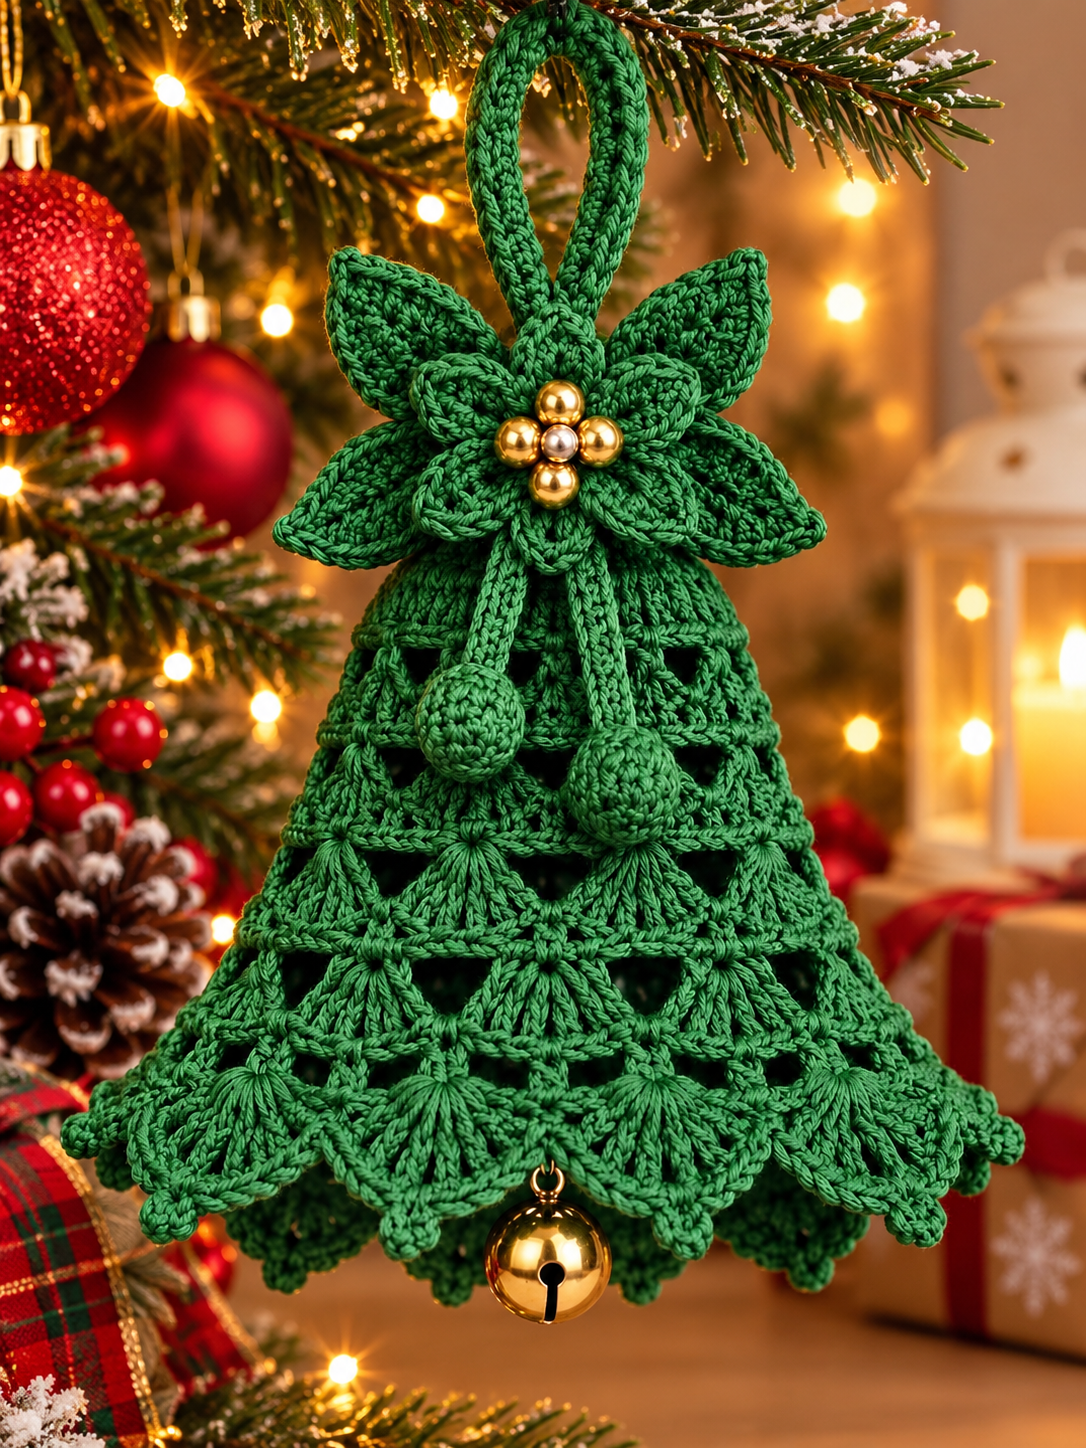

Create a beautiful green crochet Christmas bell featuring delicate lace stitches, a decorative floral topper, dangling crochet beads, and a golden jingle bell. Perfect for Christmas trees, holiday gifts, and festive home decorations.
Skill Level: Intermediate | US Crochet Terms | Approximate finished size: 12–15 cm (5–6 inches)
Materials Needed
- Green cotton yarn (sport or DK weight)
- 2.5–3 mm crochet hook
- Four small gold beads and one pearl bead
- One small gold jingle bell
- Yarn needle and scissors
- Stitch markers
- Optional fabric stiffener
Crochet Abbreviations
| Abbreviation | Meaning |
| MR | Magic Ring |
| ch | Chain |
| sl st | Slip Stitch |
| sc | Single Crochet |
| hdc | Half Double Crochet |
| dc | Double Crochet |
| tr | Treble Crochet |
| st | Stitch |
| rep | Repeat |
| BLO | Back Loop Only |
Part 1: Crochet the Bell Body
The bell is worked from the narrow top toward the wide scalloped bottom.
Round 1: Make a magic ring, ch 3 (counts as first dc), work 11 dc into the ring. Join with sl st. (12 dc)
Round 2: Ch 3, dc in same stitch, 2 dc in each stitch around. Join. (24 dc)
Round 3: Ch 3, dc in each stitch around. Join. (24 dc)
Round 4: Ch 3, dc in next stitch, ch 2, skip 2 stitches. Repeat around to create the first openwork row.
Round 5: Work 3 dc into each ch-2 space, ch 1 between groups. Join.
Round 6: Work 2 dc into each stitch group, increasing evenly to widen the bell.
Round 7: Ch 3, work alternating dc groups and ch-2 spaces around to develop the lace pattern.
Rounds 8–12: Continue the decorative shell pattern, increasing evenly as needed to form a gradually widening bell.
For the shell sections, work 5 dc into each designated chain space, followed by ch 1 and sc into the next connecting space.
Part 2: Scalloped Bell Border
Work along the bottom edge:
- Attach green yarn to the first stitch.
- Ch 1, sc in the same stitch.
- Skip 2 stitches, work 7 dc into the next stitch.
- Skip 2 stitches, sc into the following stitch.
- Repeat around the entire bottom edge.
- Join with a slip stitch and fasten off.
For a more decorative finish, add a small picot at the center of each shell.
Part 3: Crochet the Decorative Leaves
Make six green leaves.
Row 1: Ch 12.
Row 2: Sc in second chain from hook, hdc in next, dc in next 3, tr in next 3, dc in next 2, sc in last chain.
Row 3: Continue around the opposite side of the foundation chain, mirroring the stitches to create a pointed oval leaf.
Row 4: Work sc around the leaf edge, adding (sc, ch 2, sc) at the tip.
Fasten off, leaving a long tail for sewing.
Arrange the leaves in two overlapping layers at the top of the bell.
Part 4: Hanging Loop
- Ch 35–45, depending on your preferred hanging length.
- Sl st into each chain to create a sturdy cord.
- Fold the cord into a loop.
- Sew both ends securely to the top of the bell.
Part 5: Dangling Crochet Balls
Make two small green balls.
Round 1: 6 sc into MR. (6)
Round 2: 2 sc in each stitch. (12)
Round 3: (Sc, inc) repeat around. (18)
Rounds 4–5: Sc in each stitch. (18)
Round 6: (Sc, dec) repeat around. (12)
Lightly stuff the ball.
Round 7: Dec around. (6)
Close the opening and fasten off.
Make two crochet cords approximately 5–7 cm long and attach one ball to each cord. Sew the cords beneath the decorative leaves.
Part 6: Gold Bead Flower
At the center of the green leaf arrangement:
- Sew four gold beads into a small flower shape.
- Add one pearl bead in the center.
- Secure all beads firmly.
- Hide the thread ends inside the crochet work.
Part 7: Attach the Golden Bell
Sew a small gold jingle bell to the center of the lower edge using strong thread.
Make sure the bell hangs freely beneath the crochet ornament.
Finishing Instructions
Gently shape the crochet bell with your fingers. If necessary, use a light fabric stiffener to help maintain its flared shape. Allow it to dry completely before hanging.
Your handmade Christmas crochet bell ornament is ready!
Pattern note: This is an original, approximate pattern inspired by the reference photo, not the exact designer’s instructions. The lace repeats and stitch counts may need adjustment to reproduce the pictured shape.
