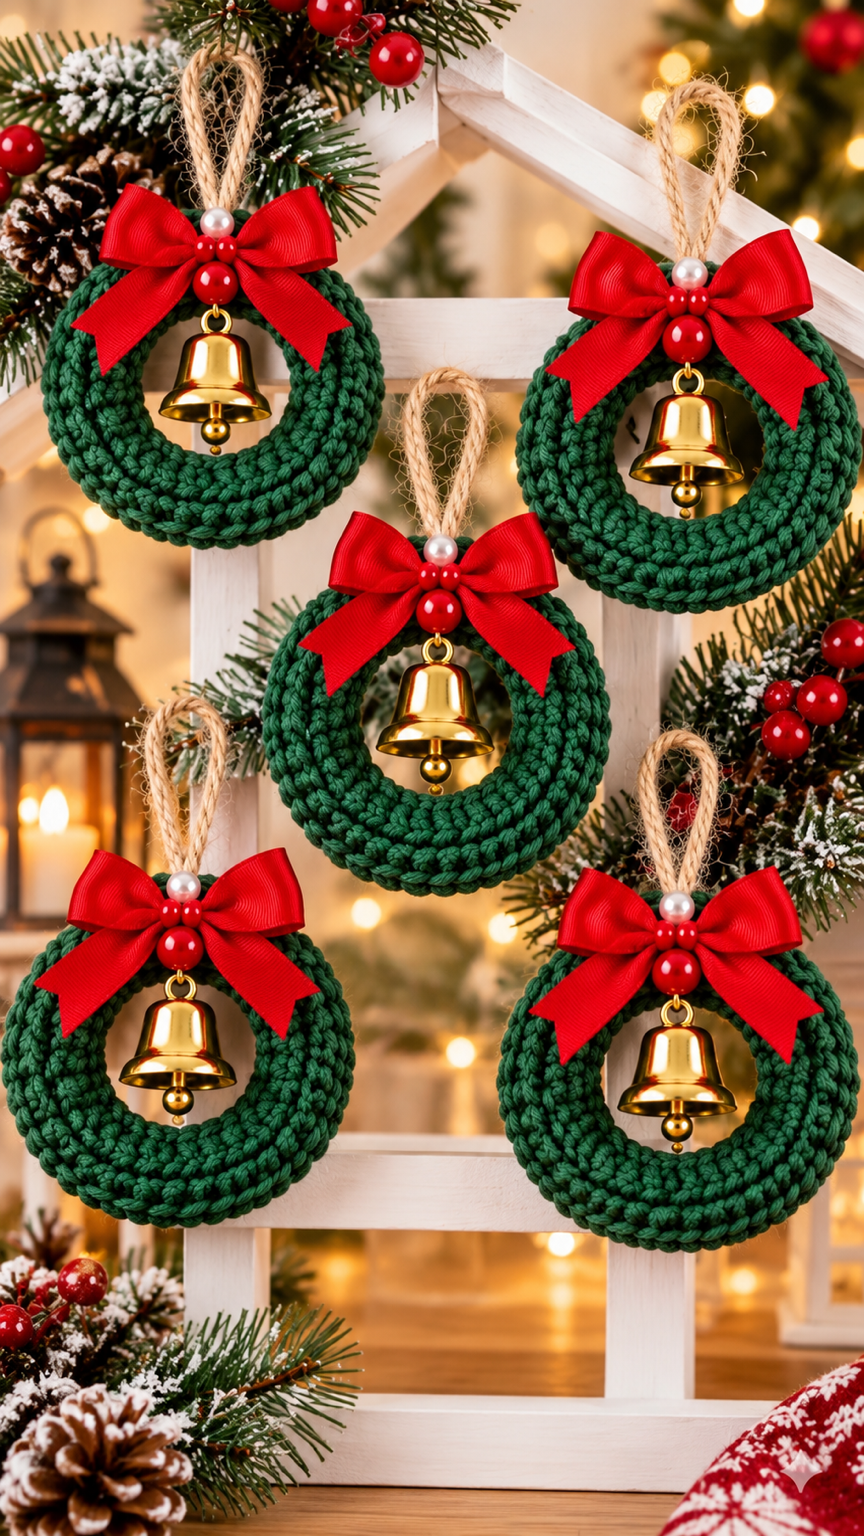

Skill Level: Easy / Beginner-Friendly Finished Size: Approximately 4–5 inches (10–13 cm) Working Time: 25–40 minutes per ornament Terminology: US Crochet Terms
Create beautiful handmade Christmas wreath ornaments featuring thick forest-green crochet stitches, bright red satin bows, golden bells, and rustic jute hanging loops. Perfect for Christmas trees, holiday gifts, and festive home decorations.
Materials Needed
- Forest-green chunky cotton yarn (approximately 20–30 yards per wreath)
- 5.0–6.0 mm crochet hook, adjusted to yarn thickness
- 3-inch (7.5 cm) wooden or plastic craft ring
- Red satin ribbon
- Small golden Christmas bell
- Red decorative beads
- White pearl bead
- Natural jute twine
- Yarn needle
- Scissors
- Needle and thread for attaching decorations
Crochet Abbreviations
| Abbreviation | Meaning |
| ch | Chain |
| sc | Single crochet |
| hdc | Half double crochet |
| dc | Double crochet |
| sl st | Slip stitch |
| st | Stitch |
| BLO | Back loop only |
| FO | Fasten off |
Step-by-Step Crochet Instructions
Step 1: Prepare the Wreath Base
Take your 3-inch craft ring and attach the forest-green yarn using a slip knot.
Insert the crochet hook through the center of the ring, yarn over, and pull up a loop.
Work 1 chain stitch to secure the yarn.
Step 2: Crochet Around the Ring
Round 1:
- Work 40–48 single crochet stitches around the craft ring.
- Push the stitches closely together to cover the entire ring.
- Join with a slip stitch to the first single crochet.
The ring should be completely covered with thick green yarn, with no visible gaps.
Step 3: Create the Raised Crochet Texture
Round 2:
- Chain 2 (does not count as a stitch).
- Work 1 half double crochet into each stitch around.
- Join with a slip stitch to the first half double crochet.
Round 3:
- Chain 1.
- Work 1 single crochet into the back loop of each stitch around.
- Join with a slip stitch.
This creates a textured ridge that resembles the thick braided stitches in the reference design.
Step 4: Finish the Wreath
Fasten off, leaving a 6-inch yarn tail.
Use a yarn needle to weave the tail securely through several stitches on the back.
Gently shape the wreath into an even circle, making sure the center remains open.
Step 5: Attach the Golden Bell
Position a small golden bell inside the wreath, directly below the top center.
Use strong thread or a small metal jump ring to attach the bell securely to the crochet stitches.
Make sure the bell hangs freely inside the wreath.
Step 6: Make the Red Satin Bow
- Cut approximately 8–10 inches of red satin ribbon.
- Fold the ribbon into two equal loops.
- Pinch the center to create a symmetrical bow.
- Secure the middle with thread.
- Attach the bow to the top of the crochet wreath.
- Add three small red beads and one white pearl bead for decoration.
Trim the ribbon ends diagonally for a professional finish.
Step 7: Add the Hanging Loop
Cut approximately 8 inches of natural jute twine.
Fold it in half to form a loop.
Pass the folded end through the upper crochet stitches and pull the loose ends through the loop to secure it.
Tie the ends together with a strong knot.
Step 8: Final Assembly
Straighten the bow, adjust the golden bell, and gently reshape the crochet wreath.
Repeat the same process to make a matching set of five ornaments.
Professional Finishing Tips
For a wreath that closely resembles the reference image, use tightly twisted chunky cotton yarn in a deep forest-green shade. Keep the stitches dense and evenly spaced.
Choose shiny golden bells and bright red satin ribbon for a traditional Christmas appearance.
Important: This is a reconstructed pattern inspired by the photograph, not a verified original pattern. The exact stitch count and yarn quantity may need adjustment depending on your craft ring and yarn thickness.
Finished Result
A beautiful, thick, textured Christmas crochet wreath with a bright red bow, a golden hanging bell, festive beads, and a rustic jute loop.
Perfect for Christmas tree ornaments, handmade holiday gifts, festive garlands, and farmhouse Christmas decorations.
