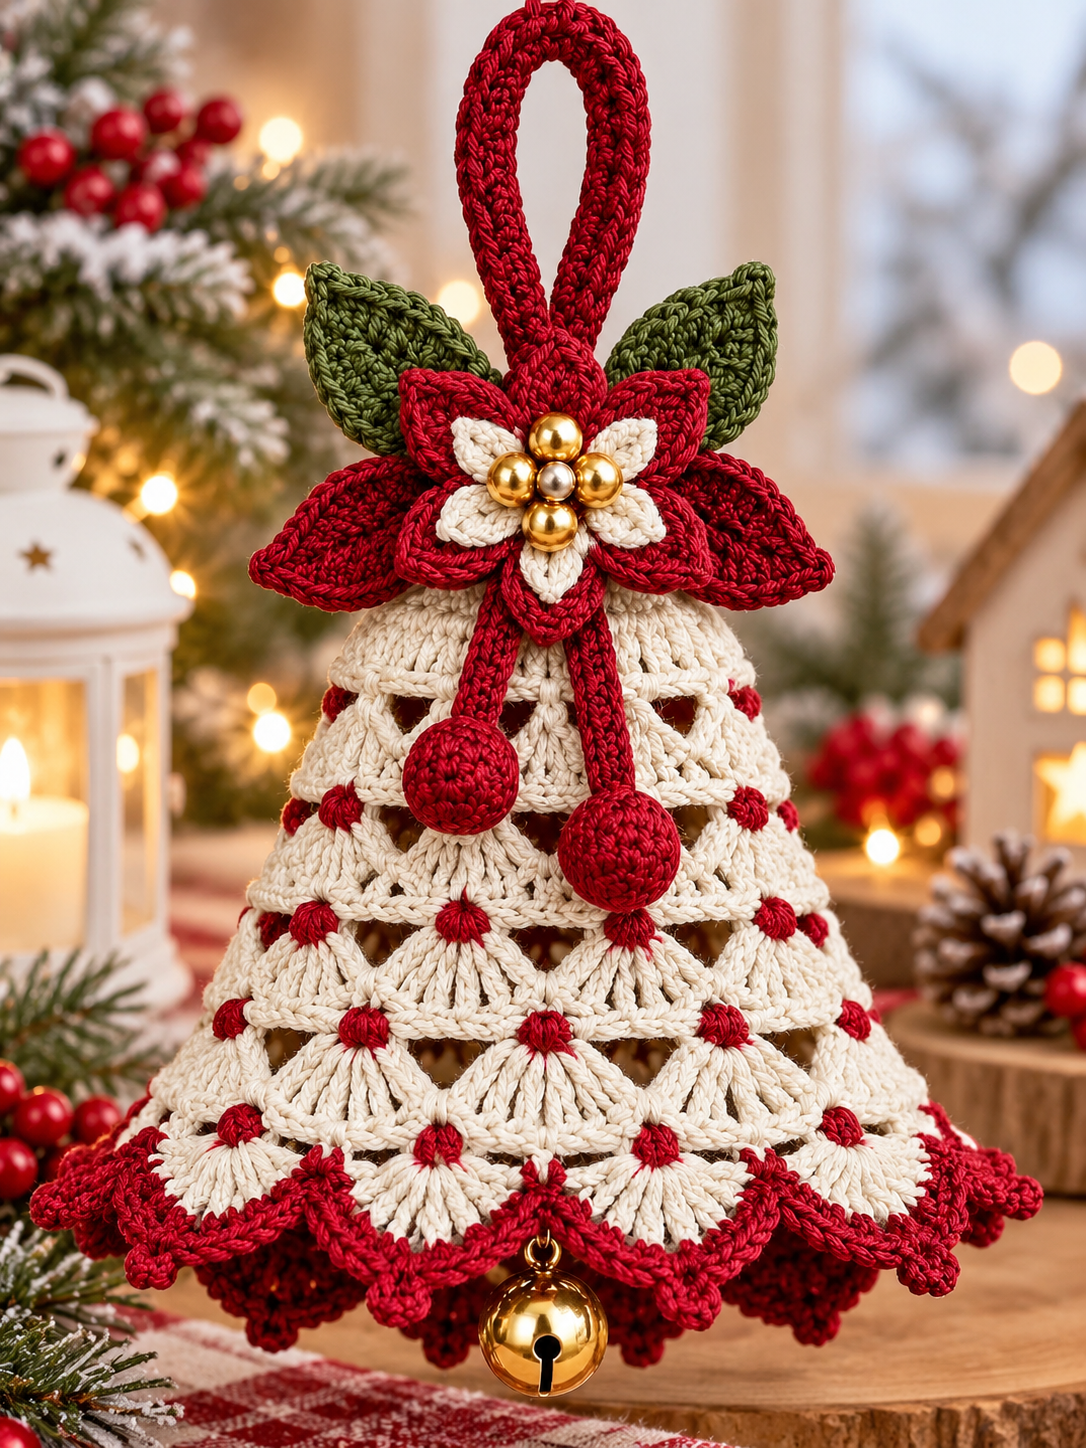

Skill Level: Intermediate Finished Size: Approximately 15–18 cm tall, excluding the hanging loop Colors: Cream, Christmas Red, and Olive Green
This beautiful handmade Christmas bell features an openwork lace body, scalloped edges, a poinsettia flower, decorative hanging balls, and a golden jingle bell.
This is a reconstructed pattern inspired by the photo, not the original designer’s verified instructions.
Materials
- Cream cotton yarn (DK weight)
- Red cotton yarn
- Olive green yarn
- 3.0 mm crochet hook
- Gold decorative beads
- Small golden jingle bell
- Yarn needle and scissors
- Stitch markers
- Fabric stiffener (optional)
Abbreviations (US Terms)
- MR – Magic Ring
- ch – Chain
- sl st – Slip Stitch
- sc – Single Crochet
- hdc – Half Double Crochet
- dc – Double Crochet
- tr – Treble Crochet
- sp – Space
- st – Stitch
- rep – Repeat
Part 1: Crochet Bell Body
Use cream yarn.
Round 1: Make a magic ring. Ch 3 (counts as dc), work 11 dc into the ring. Join with sl st. (12 dc)
Round 2: Ch 3, dc in the same stitch, 2 dc in every stitch around. Join. (24 dc)
Round 3: Ch 3, dc in next stitch, ch 2, skip 1 stitch. Repeat around, adjusting the final repeat to join neatly.
Round 4: Work 3 dc into each ch-2 space, separated by ch 2.
Round 5: Work (3 dc, ch 2, 3 dc) into each ch-2 space to form the first openwork fans.
Round 6: Sl st to the center of the first fan. Work (3 dc, ch 3, 3 dc) into each fan center, with ch 1 between fans.
Round 7: Repeat the fan pattern, adding one extra chain between groups to widen the bell.
Round 8: Work (4 dc, ch 3, 4 dc) into each fan center.
Rounds 9–11: Continue the expanding fan pattern, keeping the open spaces evenly distributed. Increase the chains between fans as necessary to maintain the bell shape.
Round 12: Work a decorative red accent stitch at each fan connection.
Rounds 13–15: Continue with cream yarn, making wider fans and allowing the bell to flare naturally.
Part 2: Scalloped Bell Border
Join red yarn at the bottom edge.
Round 1: Work sc evenly around the entire lower edge.
Round 2: In each fan center, work (2 hdc, 5 dc, 2 hdc), then sl st into the space between fans.
Round 3: Work sc around the scallops, placing 3 sc at each scallop peak for a defined decorative edge.
Fasten off and weave in ends.
Part 3: Crochet Poinsettia Flower
Use red and cream yarn.
Flower Center: Make MR, ch 1, work 6 sc into ring, join.
Petals: For each of the six petals, ch 7. Starting in the second chain, work sc, hdc, 2 dc, hdc, sc. Sl st back into the center.
Repeat until six petals are complete.
Make a smaller flower using cream yarn and ch-5 petals. Place it over the red flower.
Sew five gold beads around a small central bead.
Part 4: Green Leaves
Make two leaves.
Ch 11.
Starting in the second chain, work:
1 sc, 1 hdc, 5 dc, 1 hdc, 1 sc.
Work around the opposite side of the chain using the same stitch sequence.
Fasten off, leaving a long tail for sewing.
Part 5: Decorative Hanging Balls
Make two red balls.
Round 1: MR, 6 sc. (6)
Round 2: 2 sc in each stitch. (12)
Round 3: (1 sc, inc) repeat around. (18)
Rounds 4–5: Sc in each stitch.
Round 6: (1 sc, dec) repeat around. (12)
Stuff lightly.
Round 7: Dec around. (6)
Close the opening.
Attach each ball to a crocheted chain approximately 6–8 cm long.
Part 6: Hanging Loop
Using red yarn, ch 35–40.
Sl st back along the chain to create a strong cord.
Fold into a loop and sew both ends securely to the top of the bell.
Part 7: Final Assembly
- Attach the poinsettia flower to the top front of the bell.
- Sew the green leaves behind the flower.
- Attach the two decorative red balls beneath the flower.
- Secure the hanging loop at the top.
- Sew the golden jingle bell to the center of the lower edge.
- Gently block the ornament and use fabric stiffener if needed to help maintain its bell shape.
Finished Result: A festive cream-and-red crochet Christmas bell with beautiful lace texture, elegant scalloped edging, and a decorative poinsettia centerpiece, perfect for Christmas trees, doors, and handmade holiday gifts.
Note: The bell-body instructions describe the construction approach but are not a fully stitch-counted, tested reproduction. The fan repeats will need adjustment to keep the shape even.
