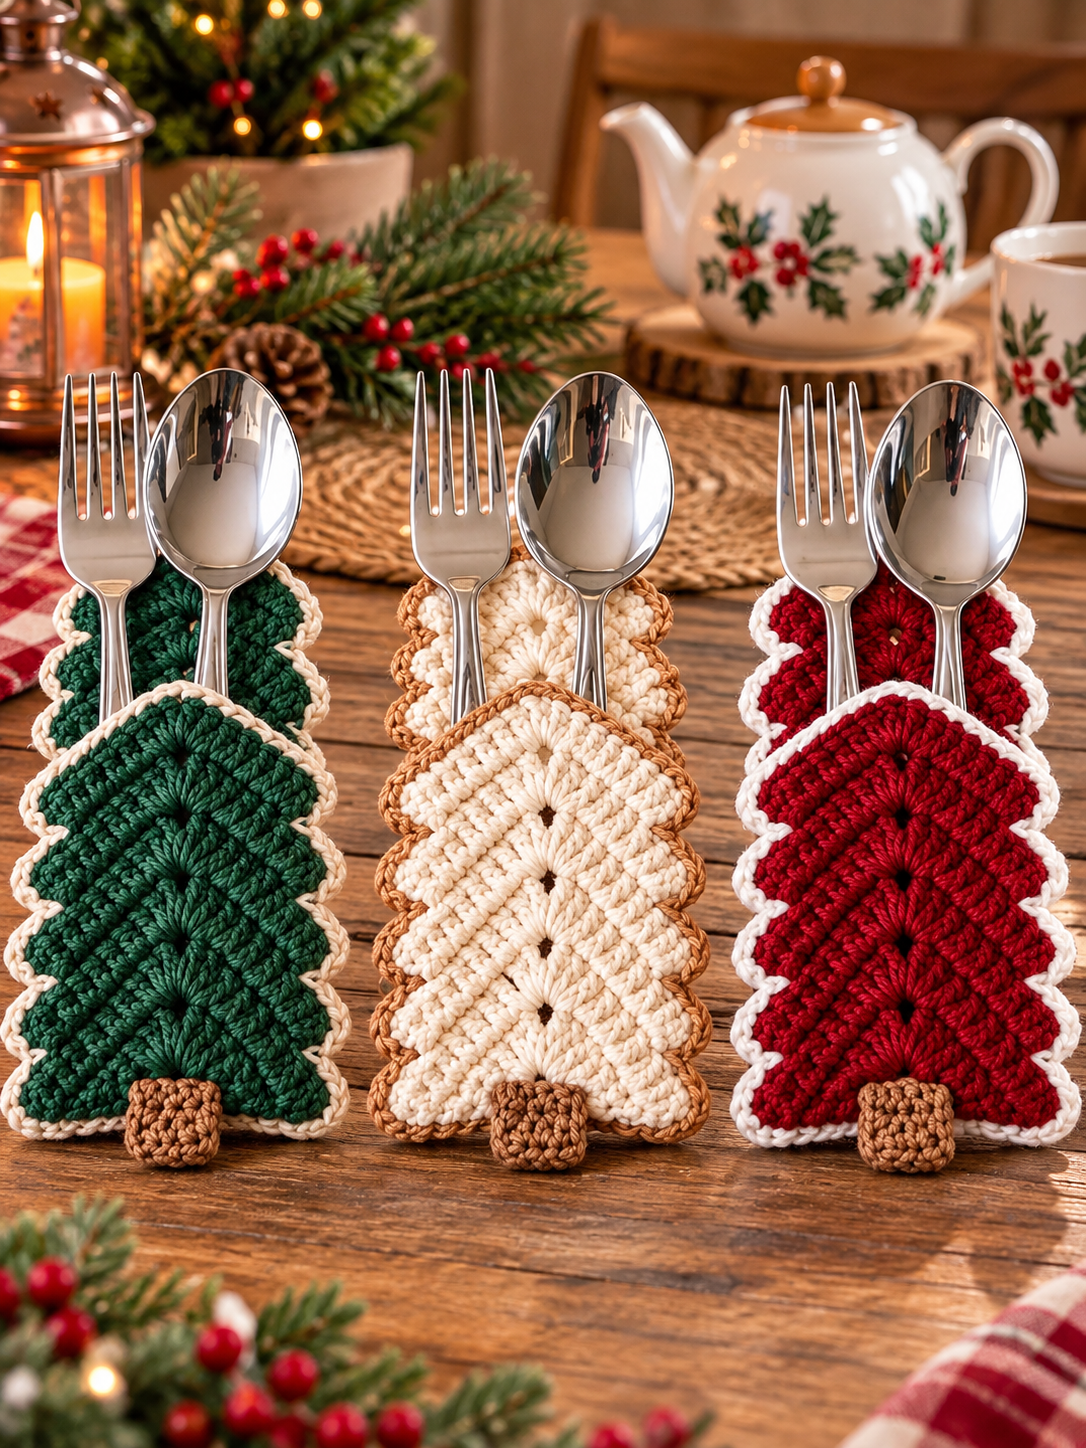

Add a charming handmade touch to your holiday table with this Crochet Christmas Tree Cutlery Holder. Designed to hold a fork, spoon, or knife, this festive project works beautifully for Christmas dinners, holiday parties, or handmade gifts. You can make the trees in classic green, red, white, cream, or any colors that match your seasonal décor.
Materials
For this project, you will need worsted-weight yarn in your main tree color, a small amount of brown yarn for the trunk, and an optional contrasting color for the border. You will also need a 4 mm crochet hook, scissors, and a yarn needle for sewing and weaving in the ends.
Abbreviations
ch – chain
sc – single crochet
dc – double crochet
sl st – slip stitch
st/sts – stitch/stitches
Tree Panel
Start with a magic ring or ch 4 and join with a sl st to form a small ring.
Row 1: Ch 2. Work 3 dc into the ring. Turn.
Row 2: Ch 2. Work 2 dc in the first stitch, 1 dc in the center stitch, and 2 dc in the last stitch. Turn.
Continue working back and forth, increasing at both sides of each row. This gradual increase creates the triangular Christmas tree shape.
As the tree becomes wider, begin forming the decorative branch sections. Work small groups or shells of double crochet stitches along the rows so that the sides develop the soft, layered appearance of Christmas tree branches.
A simple shell can be made by working several double crochets into the same stitch, then skipping one or more stitches before making the next shell.
Continue adding rows until the tree reaches approximately 15–18 cm / 6–7 inches tall, or until it is large enough to hold your cutlery comfortably.
Fasten off and weave in the ends.
Make the Second Panel
Crochet a second Christmas tree panel using the same instructions. Try to keep both panels the same size and shape because they will be joined together to create the cutlery pocket.
Decorative Border
Place the two tree pieces together with the wrong sides facing each other.
Using your contrasting yarn, attach the yarn near one bottom corner.
Work single crochet evenly around the outer edges of both layers. You can also use a decorative shell or scalloped edging if you prefer a more festive finish.
Do not completely close the top section. Leave enough space for the fork and spoon handles to slide inside.
Fasten off securely.
Crochet Tree Trunk
Using brown yarn:
Row 1: Ch 7.
Starting in the second chain from the hook, work 1 sc in each chain across. Turn.
Rows 2–5: Ch 1, sc in each stitch across. Turn.
Adjust the number of rows depending on how large you want the trunk.
Fasten off, leaving a long tail for sewing.
Position the trunk at the center bottom of the Christmas tree and sew it securely in place.
Assembly
Place one tree panel on top of the other. Join the sides and bottom while leaving the upper opening accessible.
Check the pocket by inserting a fork and spoon. The handles should fit comfortably without stretching the crochet too much.
Once you are happy with the shape, weave in all remaining yarn ends.
Color Ideas
For a traditional Christmas look, use forest green with cream edging and a brown trunk. For a brighter holiday table, try deep red with white edging. A cream or white tree with caramel or gold-colored edging gives the project a softer, elegant farmhouse style.
You can also make several holders in different colors and alternate them around the dinner table.
Finishing Touches
For extra decoration, add small crochet stars, tiny bows, beads, wooden buttons, or embroidered dots that resemble Christmas ornaments. Keep decorations away from the opening so the cutlery can easily slide inside.
Finished Size
The finished holder should measure approximately 15–18 cm tall and 10–13 cm wide, depending on your yarn, hook size, and tension.
This Christmas tree cutlery holder is a quick and festive crochet project that can be reused year after year. Make a matching set for your holiday table, personalize each one with different colors, or include them in handmade Christmas gift sets.