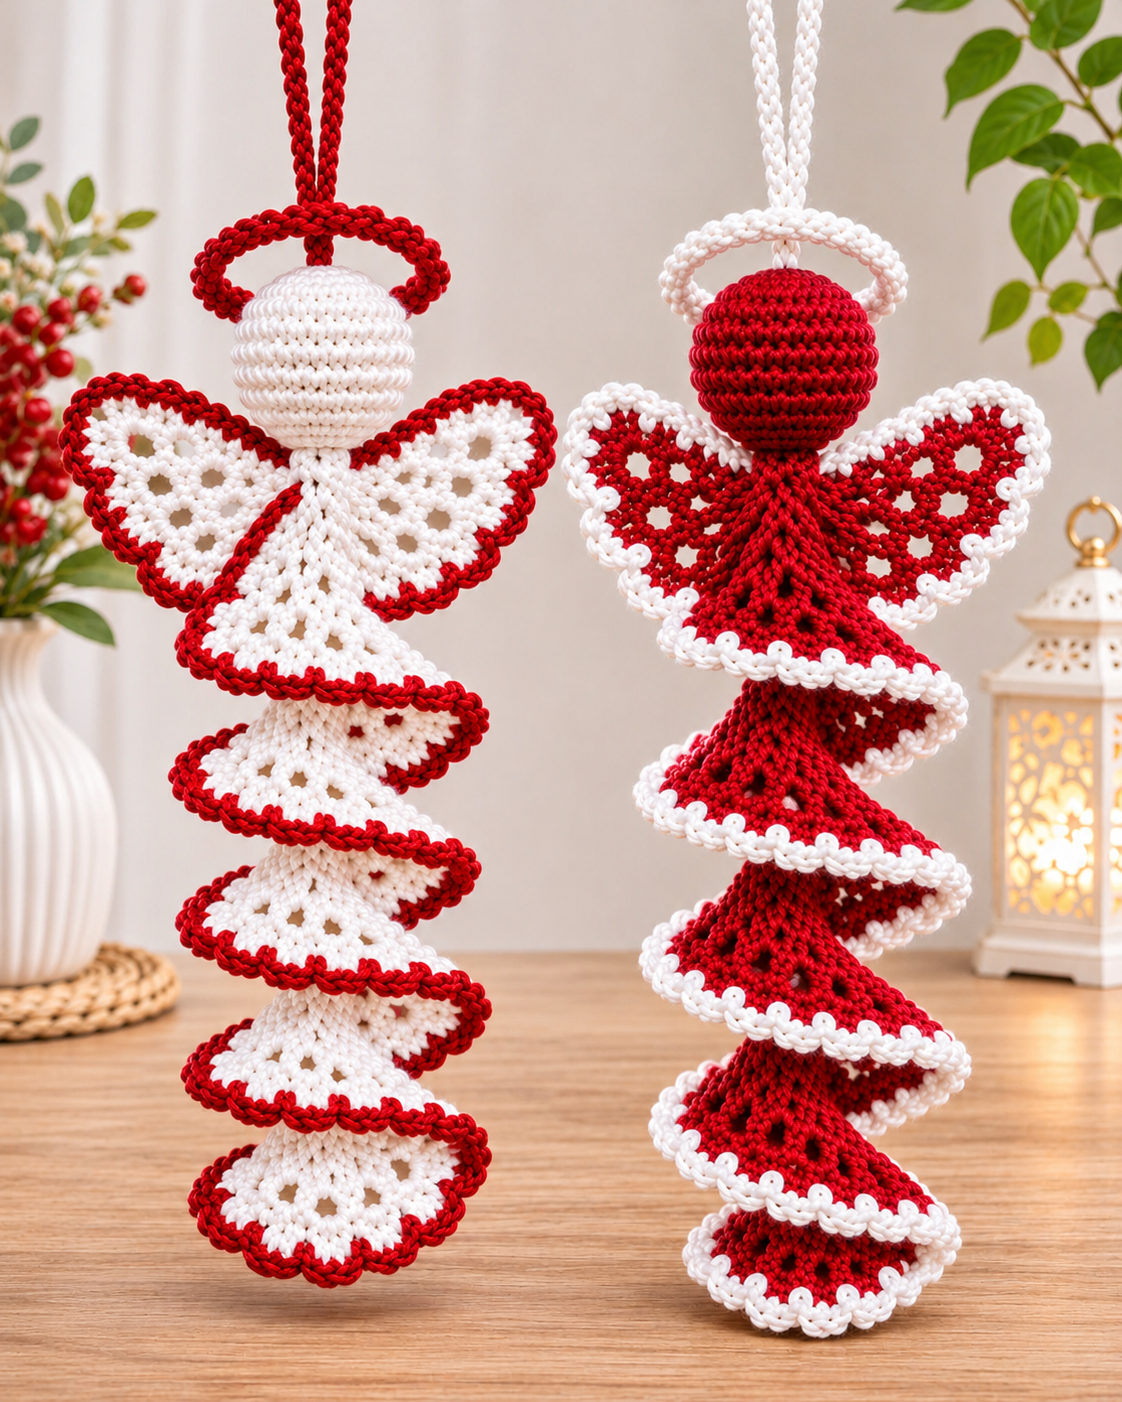

Skill Level: Intermediate Crochet Terms: US Finished Size: Approximately 25–30 cm Colors: Red and White
Pattern note: This is an original, untested pattern inspired by the reference image. The finished result may differ from the photograph.
Materials
- Red cotton yarn (DK weight)
- White cotton yarn (DK weight)
- 3.0 mm crochet hook
- Fiberfill stuffing
- Yarn needle
- Scissors
- Stitch markers
Crochet Abbreviations
- MR – Magic Ring
- ch – Chain
- sc – Single Crochet
- dc – Double Crochet
- sl st – Slip Stitch
- inc – Increase (2 sc in one stitch)
- dec – Decrease
- st – Stitch
- picot – Ch 3, sl st into first chain
1. Crochet Angel Head
Use white yarn for the first angel and red yarn for the second.
Round 1: 6 sc into MR (6).
Round 2: inc in every stitch (12).
Round 3: (1 sc, inc) repeat 6 times (18).
Round 4: (2 sc, inc) repeat 6 times (24).
Rounds 5–10: 1 sc in each stitch (24).
Round 11: (2 sc, dec) repeat 6 times (18).
Round 12: (1 sc, dec) repeat 6 times (12).
Stuff firmly with fiberfill.
Round 13: dec 6 times (6).
Fasten off and close the opening.
2. Crochet Spiral Body
Use the same yarn color as the head.
Row 1: Ch 45.
Row 2: Work 3 dc into the fourth chain from the hook, then 3 dc into each remaining chain.
Row 3: Ch 3, turn. Work 2 dc into every stitch across.
The increased stitches will create a long, naturally curling spiral.
Decorative Border:
Attach contrasting yarn.
Work sc evenly along the outer spiral edge, adding a picot every 6–8 stitches.
Fasten off and weave in the ends.
3. Crochet Angel Wings (Make 2)
Use the main yarn color.
Row 1: Ch 8. Work 1 dc into the fourth chain from the hook and 1 dc into each remaining chain.
Row 2: Ch 3, turn. Work 2 dc in the first stitch, 1 dc in each middle stitch, and 2 dc in the last stitch.
Row 3: Ch 4, turn. Work (dc, ch 1) into each stitch across.
Row 4: Ch 3, turn. Work 2 dc into each chain space to create a gently curved wing.
Row 5: Work sc evenly around the wing, placing 3 sc at the outer tip.
Attach contrasting yarn and crochet a decorative scalloped border using (sc, ch 3, sc) at regular intervals.
Fasten off, leaving a long tail for sewing.
Make the second wing as a mirror image during assembly.
4. Crochet Halo
Use contrasting yarn.
- Ch 30.
- Join with sl st to form a ring, ensuring the chain is not twisted.
- Work 1 sc into each chain around.
- Join with sl st and fasten off.
The finished halo should form a small circular ring above the angel’s head.
5. Hanging Cord
- Ch 45 using the same color as the halo.
- Sl st into the second chain from the hook and each remaining chain.
- Fasten off, leaving a long sewing tail.
- Fold the cord in half to create a hanging loop.
6. Assembly
- Position the crocheted head at the top of the spiral body.
- Sew the narrow upper end of the spiral securely beneath the head.
- Attach both wings symmetrically behind the head.
- Sew the halo above the head.
- Attach the hanging cord securely to the halo and head.
- Adjust the spiral so it hangs vertically.
- Weave in all loose ends.
7. Color Combinations
Angel 1 – White and Red
- Head: White
- Spiral body: White
- Wings: White
- Decorative edging: Red
- Halo: Red
- Hanging cord: Red
Angel 2 – Red and White
- Head: Red
- Spiral body: Red
- Wings: Red
- Decorative edging: White
- Halo: White
- Hanging cord: White
Finishing Tips
Lightly steam-block the wings without touching the yarn directly with the iron. Shape the spiral by hand and allow it to hang freely.
For a longer ornament, increase the starting chain of the spiral body. For a fuller spiral, experiment with additional increases, keeping in mind that this will require significantly more yarn.
Hang the completed angels on a Christmas tree, decorative branch, or wall hook.
Finished Project: A pair of handmade red and white crochet spiral angels with lace wings, circular halos, contrasting scalloped borders, and long cascading spiral bodies.
