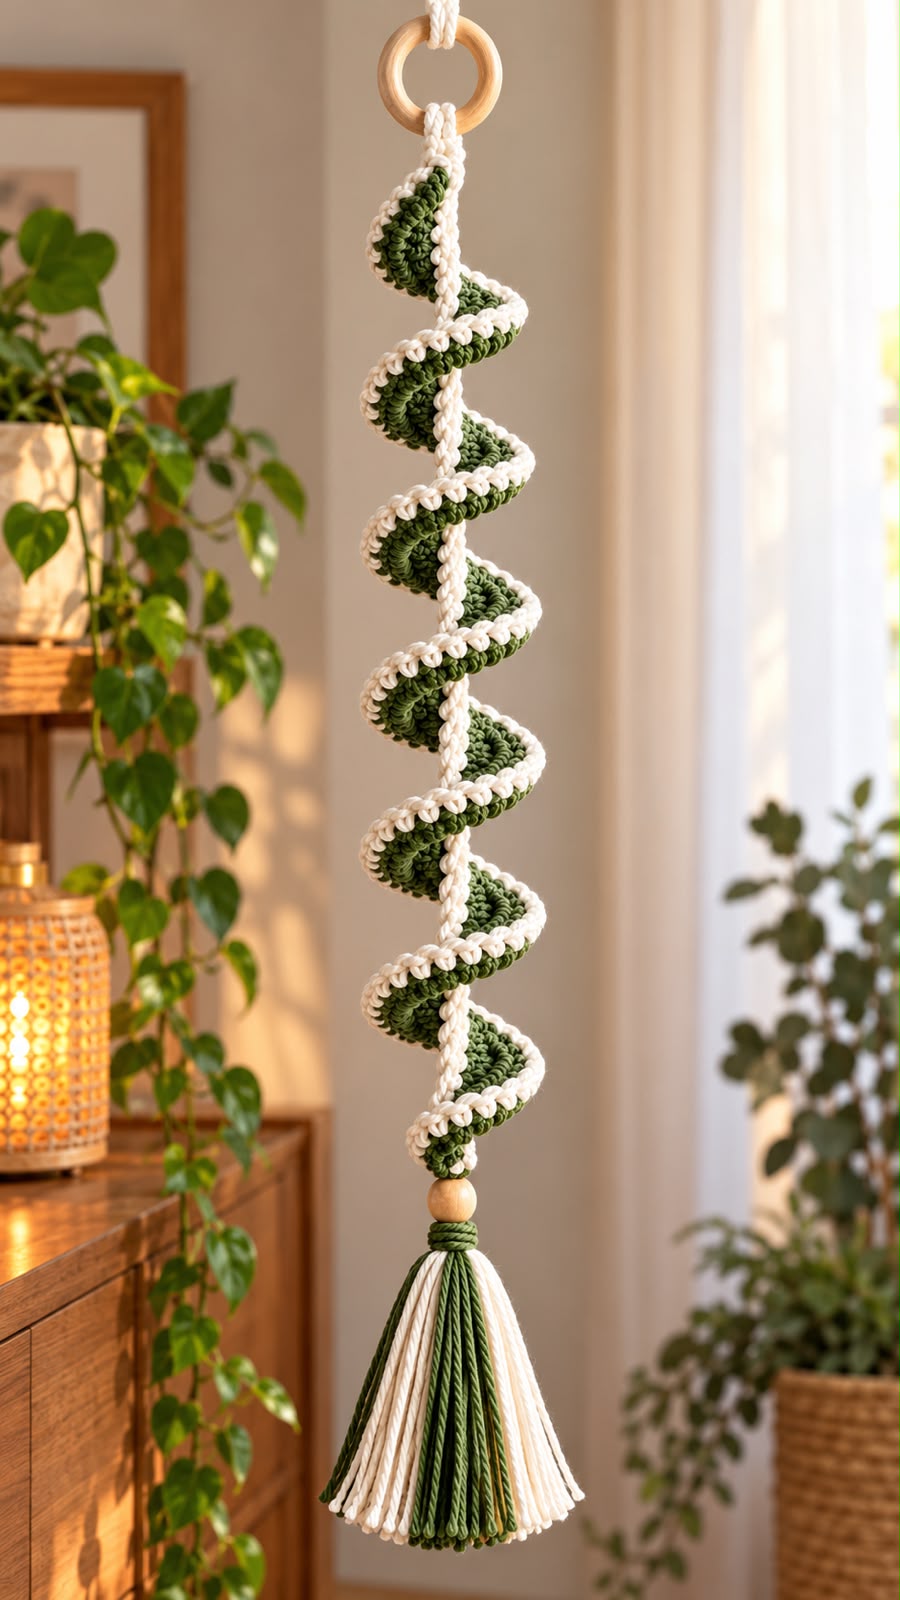

Create a beautiful handmade crochet spiral wall hanging featuring a rich olive-green spiral, soft ivory edging, a natural wooden hanging ring, and a decorative two-color tassel.
This elegant design is perfect for boho home décor, living rooms, bedrooms, windows, and handmade gifts.
Skill Level: Easy to Intermediate Crochet Terms: US Terminology Finished Length: Approximately 50–65 cm (20–26 inches) Construction: Crocheted spiral, central hanging cord, wooden ring, and tassel
This is a reconstructed pattern inspired by the photograph, not the original designer’s verified instructions. Adjustments may be needed to match the exact spiral.
Materials Needed
- Olive-green cotton yarn (approximately 80–100 g)
- Ivory or cream cotton yarn (approximately 40–60 g)
- 3.5 mm or 4 mm crochet hook
- Wooden ring (4–5 cm diameter)
- Wooden bead (12–15 mm)
- Yarn needle
- Scissors
- Measuring tape
- Optional fabric stiffener
For the best results, use medium-weight cotton yarn that holds its shape.
Crochet Abbreviations
| Abbreviation | Meaning |
| MR | Magic Ring |
| ch | Chain |
| sc | Single Crochet |
| hdc | Half Double Crochet |
| dc | Double Crochet |
| tr | Treble Crochet |
| sl st | Slip Stitch |
| inc | Increase |
| st(s) | Stitch(es) |
| FO | Fasten Off |
| RS | Right Side |
| WS | Wrong Side |
Part 1: Crochet the Olive-Green Spiral
The main feature is a long, flowing corkscrew created by increasing stitches along a foundation chain.
Step 1: Foundation Chain
Using olive-green yarn:
Ch 100.
This forms the base of the spiral.
For a shorter ornament, chain 75–85. For a longer wall hanging, chain 110–120.
Step 2: First Spiral Row
Row 1: Starting in the third chain from the hook, work 3 dc into each chain across.
You should have 294 dc.
The fabric will naturally begin to twist into a corkscrew shape as you crochet.
Do not try to flatten the strip.
Step 3: Strengthen the Spiral
Row 2: Ch 1, turn. Work 1 sc into each stitch across.
FO and weave in the ends.
The spiral should now have a full, rounded shape.
Tip: If the spiral is too loose, use 4 dc in each foundation chain instead of 3. If the fabric becomes overly crowded, use 2 dc per chain.
Part 2: Add the Ivory Crochet Border
The cream-colored border highlights the spiral and gives it a beautiful contrasting finish.
Join ivory yarn at one end of the outer edge.
Border Round:
Work 1 sc into each available stitch along the outside of the olive-green spiral.
At curves, work additional sc stitches only where needed to prevent the edging from pulling tight.
Continue along the entire outer edge.
FO and weave in the ends.
For a thicker white border, work a second row of sc.
The finished spiral should display a clearly visible green center with ivory detailing around the outer edge.
Part 3: Create the Central Hanging Cord
The reference design features a cream-colored braided center that helps support the spiral.
Using ivory yarn:
Step 1: Ch 115.
Step 2: Starting in the second chain, work 1 sl st into every chain.
FO, leaving a long sewing tail.
Alternatively, create a thicker cord by working an I-cord or braiding three strands of cotton yarn.
The finished central cord should be approximately as long as the finished spiral.
Part 4: Assemble the Spiral Around the Cord
Lay the completed green spiral on a flat surface.
Position the cream-colored central cord along the middle of the spiral.
Allow the spiral to twist naturally around the cord.
Using a yarn needle and ivory yarn, sew the inner edge of the spiral to the central cord at regular intervals.
Keep the stitches hidden as much as possible.
Do not pull the spiral tightly against the cord. Leave enough space to maintain its open, three-dimensional shape.
Adjust the loops by hand until they are evenly distributed from top to bottom.
Part 5: Attach the Wooden Hanging Ring
Take a natural wooden ring approximately 4–5 cm wide.
Thread the top of the ivory central cord through the ring.
Fold the end over and secure it using strong stitches.
Wrap several turns of ivory yarn around the attachment point for a neat handmade finish.
Make sure the ring can comfortably support the weight of the finished crochet spiral.
Part 6: Make the Green and Ivory Tassel
The long two-color tassel creates the elegant decorative finish at the bottom.
Step 1: Prepare the Yarn Strands
Cut approximately:
- 20 olive-green strands, each 30 cm long.
- 20 ivory strands, each 30 cm long.
You can increase the number of strands if you prefer a fuller tassel.
Step 2: Form the Tassel
Arrange the olive-green and ivory strands together.
Fold the entire bundle in half.
Tie a separate piece of yarn securely around the folded center.
Step 3: Create the Tassel Neck
Approximately 2 cm below the fold, wrap olive-green yarn tightly around the bundle several times.
Secure the wrapping with a hidden knot.
Trim the tassel ends evenly.
The finished tassel should measure approximately 13–15 cm long.
Part 7: Add the Wooden Bead
Thread the bottom end of the central hanging cord through the wooden bead.
Slide the bead into position just beneath the crochet spiral.
Secure the bead with a knot or a few hidden stitches.
Attach the prepared tassel beneath the bead.
Check that the tassel hangs straight and that the knot is concealed.
Part 8: Final Shaping
Hang the completed decoration from a hook.
Gently separate and arrange the spiral curls so they form a continuous, balanced corkscrew.
Make sure the olive-green crochet sections face outward and the ivory edging is visible.
If necessary, lightly steam the crochet from a safe distance and shape the curves by hand.
Allow the decoration to dry completely while hanging.
Customize Your Crochet Spiral
You can create different versions using beautiful color combinations:
| Main Color | Border & Tassel Contrast |
| Olive Green | Ivory White |
| Burgundy Red | Cream |
| Sage Green | Beige |
| Dusty Rose | White |
| Navy Blue | Silver Gray |
| Mustard Yellow | Natural Cotton |
You can also decorate the wooden ring with small beads, ribbons, or other lightweight handmade accessories.
Care Instructions
Hand wash gently in cool water with mild detergent.
Avoid twisting or wringing the spiral.
Reshape the curls while damp and allow the decoration to air-dry completely.
Use a soft brush or your fingers to straighten the tassel when needed.
Final Result
Your completed crochet spiral wall hanging will feature a beautiful three-dimensional olive-green corkscrew, delicate ivory edging, a natural wooden hanging ring, and a matching tassel.
