
Materials
- Black worsted-weight yarn
- Orange worsted-weight yarn
- White worsted-weight yarn
- Green yarn
- Crochet hook suitable for your yarn
- Scissors
- Yarn needle
Granny Square Motif
Round 1 – Center
Using the required color, make a magic ring.
Chain 3 (counts as the first double crochet), then work 11 double crochets into the ring. Join with a slip stitch to the top of the beginning chain-3.
Round 2 – Orange Detail
Join orange yarn. Chain 3, then work 1 double crochet in the same stitch. Work 2 double crochets in each stitch around. Join with a slip stitch.
Round 3 – White Round
Join white yarn. Chain 3. Work double crochets around, creating evenly spaced corners with 2 double crochets, chain 2, 2 double crochets in each corner space.
Round 4 – Black Background
Join black yarn. Crochet around the square using double crochet stitches. At each corner, work 2 double crochets, chain 2, 2 double crochets to maintain the square shape.
Fasten off and weave in the ends.
Pumpkin Motif
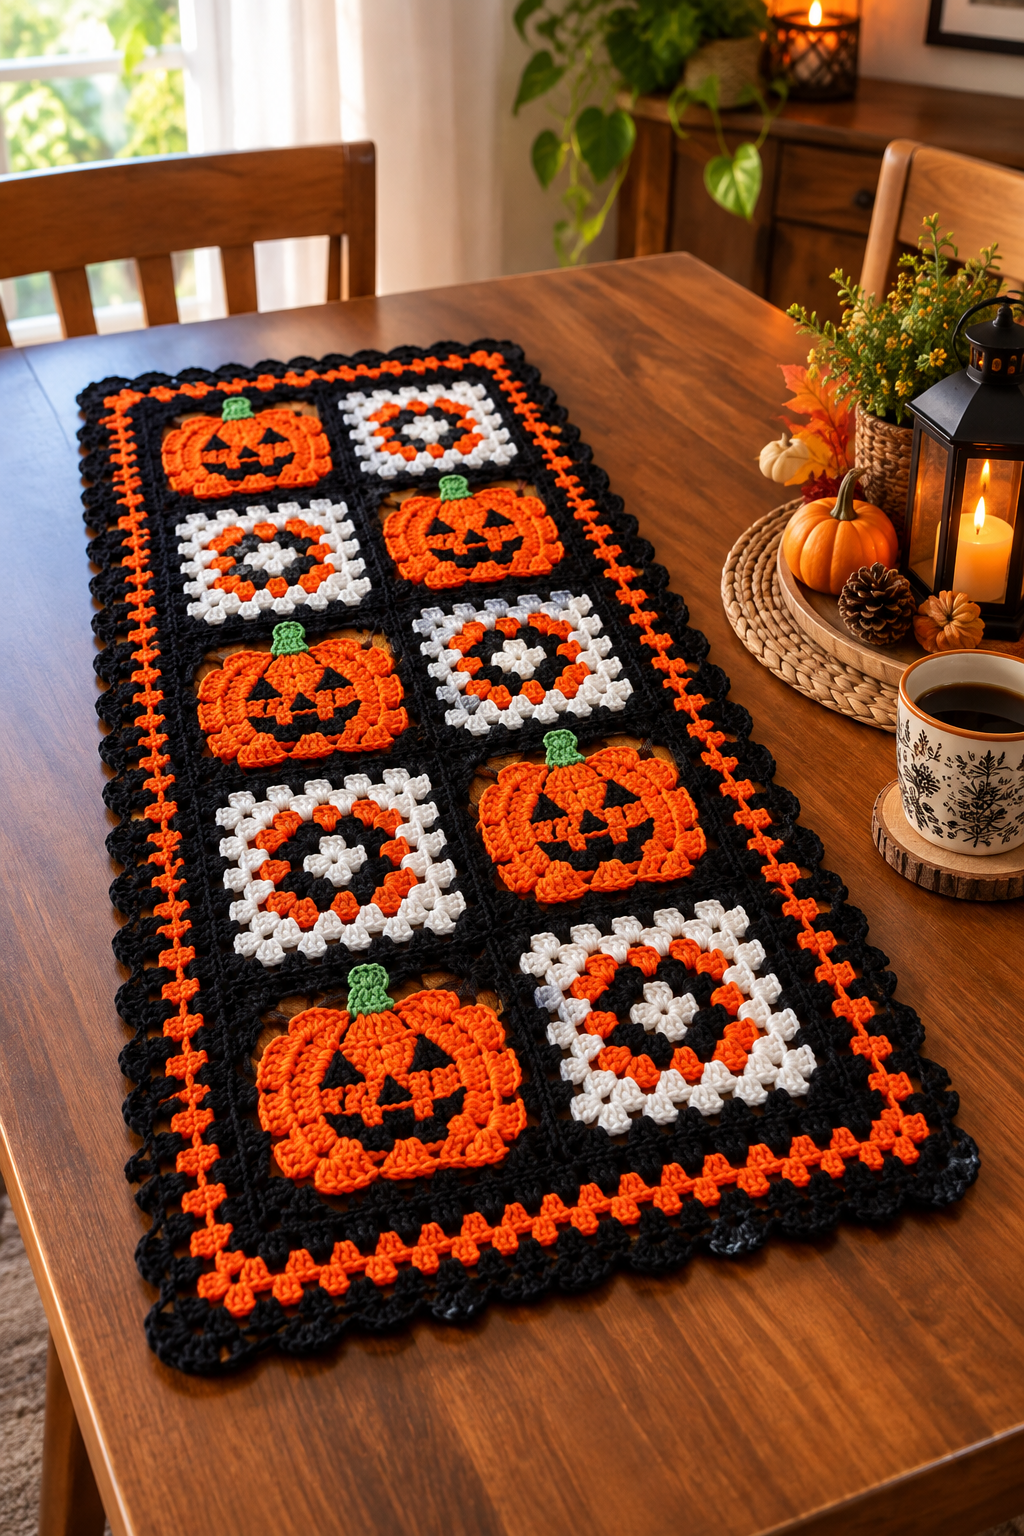
Using orange yarn, crochet the pumpkin shape on selected squares with raised stitches. Shape the pumpkin with several curved sections to create the characteristic pumpkin silhouette.
Use black yarn to add the eyes, nose, and smiling mouth.
With green yarn, crochet a small stem at the top of each pumpkin.
Assemble the Runner
Make the granny squares needed for the desired table-runner length. Arrange them in two columns, alternating the pumpkin squares with the orange-and-white geometric squares as shown in the design.
Join the squares together using black yarn and neat slip stitches or single crochet.
Border
Work several rounds around the entire runner:
- Black base round — single crochet evenly around.
- Orange decorative round — add small, evenly spaced stitches around the edge.
- Black finishing round — crochet around the entire piece.
- Finish with a scalloped black edging for the decorative outer border.
Fasten off and weave in all ends.
Finishing
Block the runner gently to straighten the squares and define the corners. Lay it flat on the table and smooth the edges.