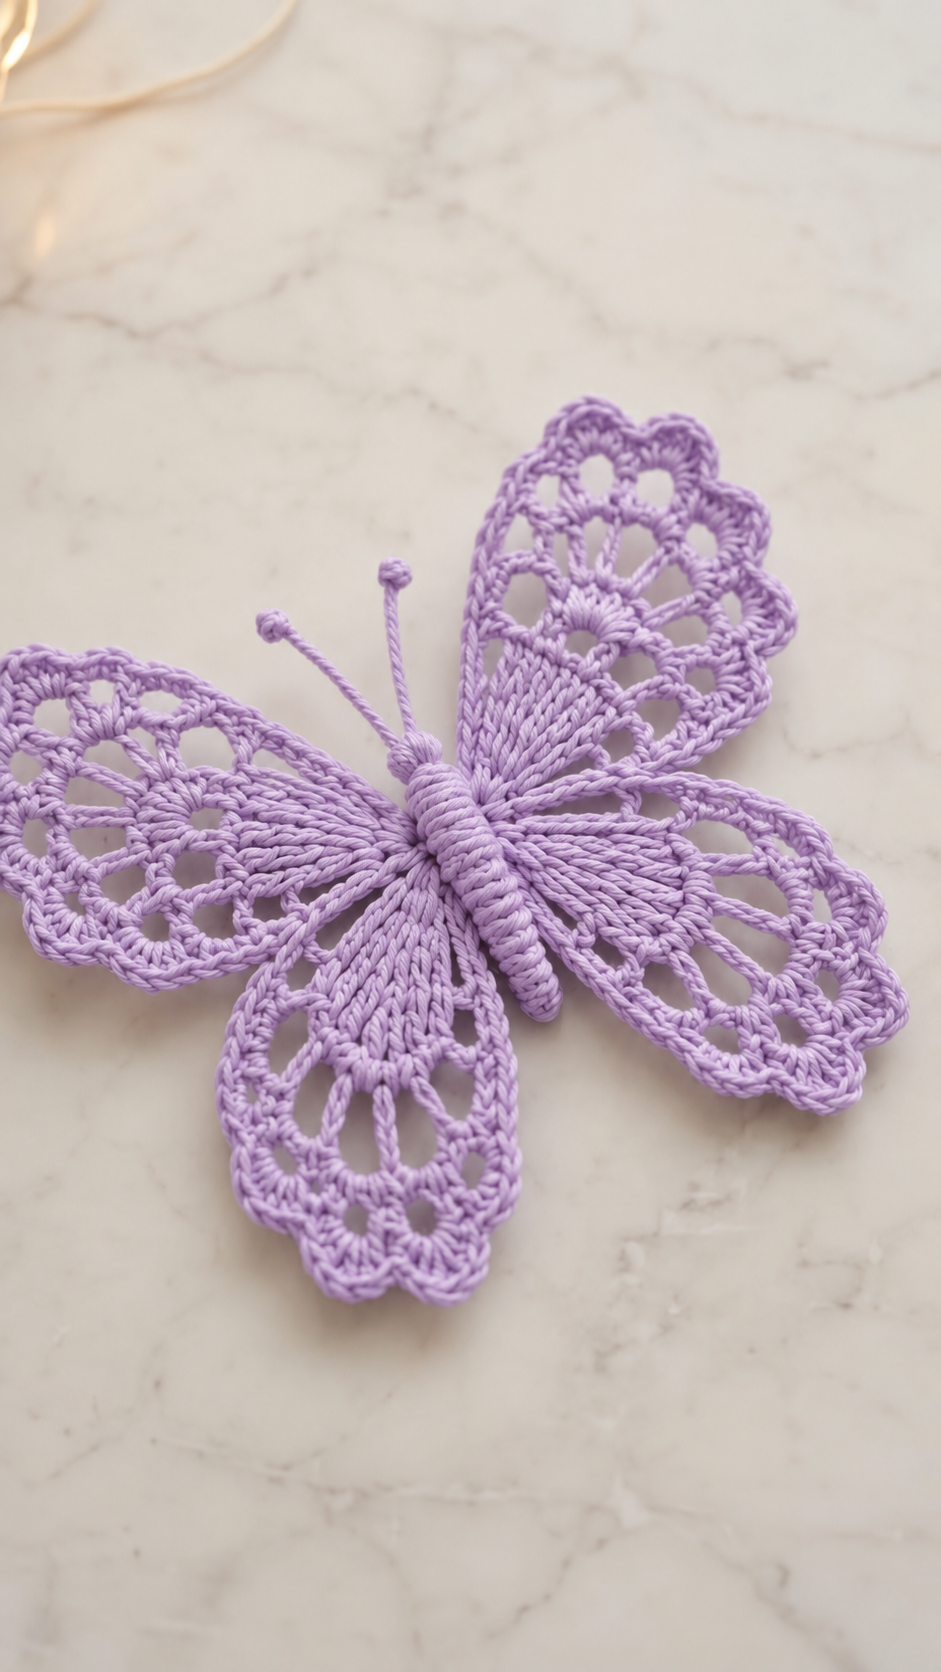

An original interpretation inspired by your photo, rather than the exact designer’s pattern. The photographed butterfly may combine crochet with wrapped cordwork; this version uses crochet wings and a wrapped body.
Skill level: Intermediate
Terminology: US crochet terms
Finished size: Approximately 15–18 cm across after blocking, depending on thread and tension.
Materials
- Size 3 cotton crochet thread in ivory or beige, approximately 80–120 m
- 2 mm crochet hook
- Tapestry needle and scissors
- Blocking pins and mat
- Fabric stiffener, optional
- A little extra cotton cord for the body and antennae
Abbreviations
- ch: chain
- sl st: slip stitch
- sc: single crochet
- hdc: half double crochet
- dc: double crochet
- tr: treble crochet
- sp: space
- st: stitch
Beginning ch 3 counts as a dc. Beginning ch 1 does not count as a stitch.
1. Upper wings — make 2
Work each wing separately in turning rows. The foundation ring forms the narrow end attached to the body.
Foundation: Ch 5, sl st into the first ch to form a ring.
Row 1: Ch 3, work 8 dc into the ring. Turn. 9 dc
Row 2: Ch 4, work (dc in the next dc, ch 1) seven times, then dc in the last dc. Turn. 9 dc and 8 ch-1 spaces
Row 3: Ch 1, sc in the first dc. Work (ch 3, sc in the next ch-1 sp) eight times, then ch 3 and sc in the final dc. Turn. 9 arches
Row 4: Ch 1, sl st into the first arch, sc in the same arch. Work (ch 3, sc in the next arch) eight times. Turn. 8 arches
Rows 5–9: Repeat Row 4, working into each successive arch across. Each row has one fewer arch:
- Row 5: 7 arches
- Row 6: 6 arches
- Row 7: 5 arches
- Row 8: 4 arches
- Row 9: 3 arches
Row 10: Ch 1, sl st into the first arch, sc in the same arch. (Ch 3, sc in the next arch) twice. Turn. 2 arches
Row 11: Ch 1, sl st into the first arch, sc in the same arch, ch 3, sc in the next arch. Turn. 1 arch
Row 12: Ch 1, work 3 sc into the remaining arch. Do not fasten off.
Wing border
Work down one side toward the foundation ring:
- Ch 1.
- Work 3 sc around each exposed row-end chain or tall stitch. Where the row end is short, work 1–2 sc instead.
- Work 3 sc into the foundation ring.
- Continue up the opposite side in the same manner.
- Join with a sl st to the first border sc.
Keep the border flat; add or omit a stitch where needed to prevent pulling or rippling.
Scalloped edging: Ch 1, sc in the first st. Repeat (skip 1 st, 5 dc in the next st, skip 1 st, sc in the next st) around the wing. Adjust the last repeat to fit, then join and fasten off.
Leave a long tail at the foundation ring for assembly.
2. Lower wings — make 2
Follow the upper-wing instructions with these changes:
- After Row 5, you have 7 arches.
- On the next row, decrease more quickly: ch 1, sl st into the first arch, sc in that arch, then (ch 2, sc in the next arch) six times. 6 arches
- Continue decreasing by one arch per row, using ch 2 between sc, until one arch remains.
- Work 3 sc into the final arch.
Add the same sc border. For a smaller scallop, use 5 hdc instead of 5 dc in each shell.
This produces two shorter wings while keeping the same lace structure.
3. Wrapped body
- Cut six strands of matching cotton cord, each approximately 12 cm long.
- Lay them together and fold them in half.
- Using a separate long strand, wrap tightly around the bundle for approximately 4–5 cm.
- Make closely packed wraps so the body appears evenly ribbed.
- Pass the wrapping end through the bundle with a tapestry needle and secure it.
- Trim and tuck in loose ends.
For an entirely crocheted alternative, ch 16, work 15 sc back along the chain, fasten off, then roll the strip lengthwise and stitch it closed.
4. Antennae
Cut a strand approximately 12 cm long. Fold it in half and secure its midpoint behind the top of the body.
Tie a small knot at each tip and trim neatly. Apply a little stiffener to help the antennae hold their curved shape.
5. Assembly
- Arrange the two upper wings with their foundation rings meeting at the center.
- Position the smaller wings below them.
- Overlap the narrow wing bases slightly and sew them together securely.
- Place the body over the central joins.
- Stitch through the underside of the body and the wing bases, keeping the stitches hidden.
- Attach the antennae behind the head.
6. Blocking and finishing
Dampen the butterfly and pin it flat. Open every lace arch, spread the upper wings outward, and angle the lower wings downward. Shape the scallops evenly and allow it to dry completely.
