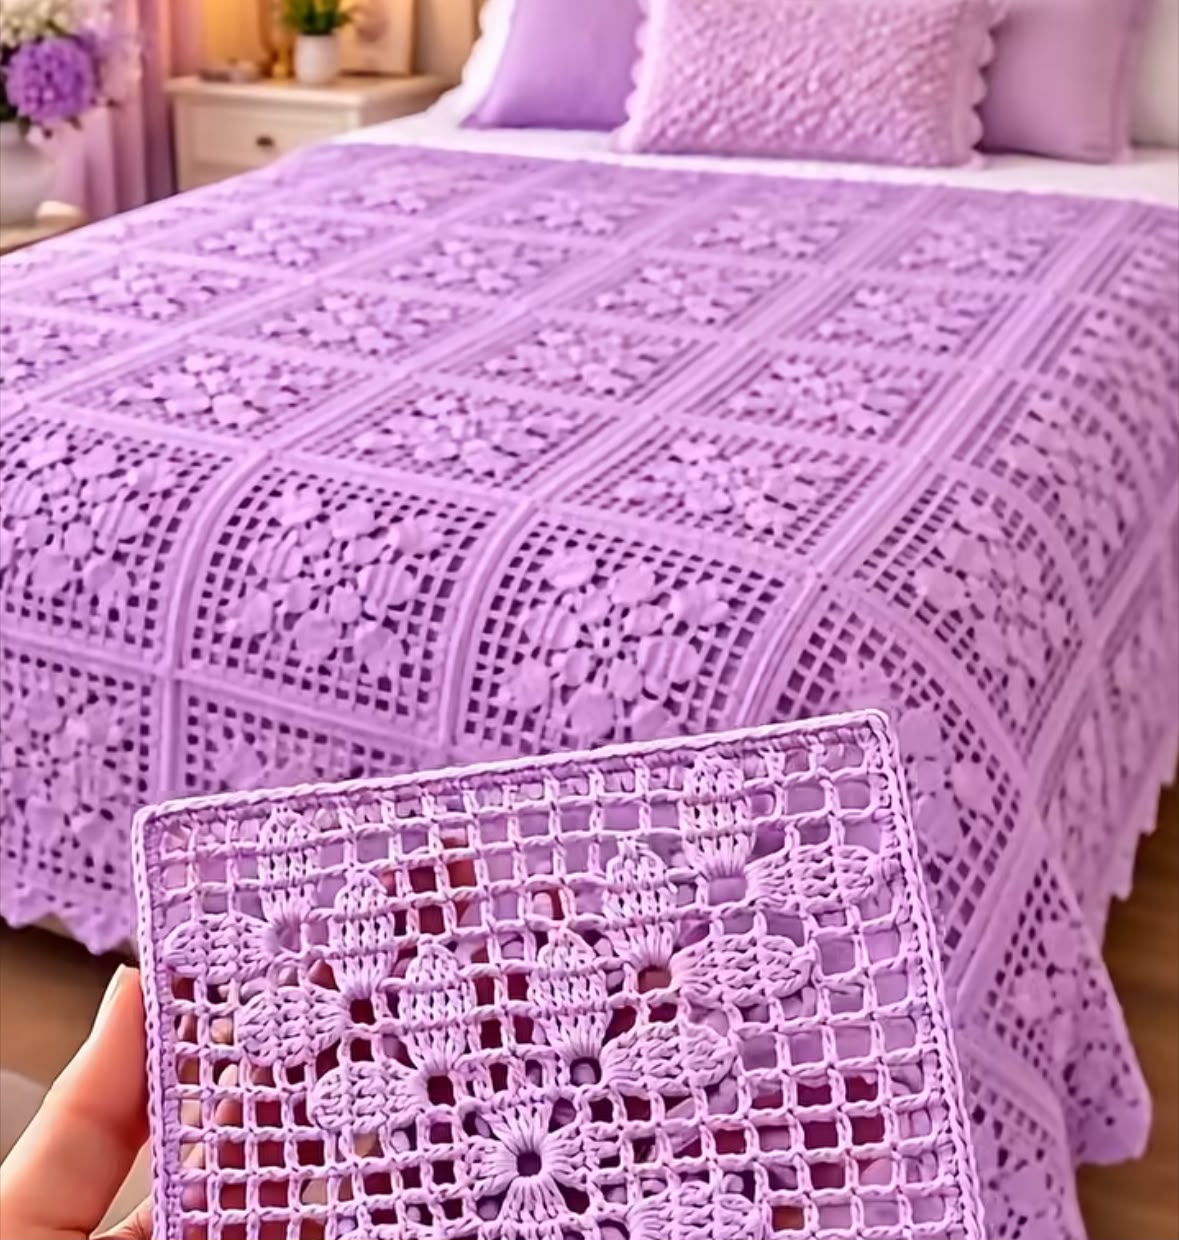

This pattern is inspired by the photograph. The exact stitches cannot be counted from the image, so the floral squares below are an original interpretation of its lavender flowers and open mesh.
Skill level: Intermediate
Terminology: US crochet terms
Materials
- Lavender DK-weight yarn: approximately 2,500–3,500 m for the blanket and pillow, depending on your square size and yarn
- 4 mm crochet hook, or the size needed to obtain a fabric you like
- Yarn needle and scissors
- Stitch markers
- 40 × 40 cm (16 × 16 in) pillow insert
Abbreviations
- ch: chain
- sl st: slip stitch
- sc: single crochet
- dc: double crochet
- tr: treble crochet
- sp: space
- st(s): stitch(es)
- RS: right side
3-dc cluster: Yarn over, insert hook in the indicated space, yarn over and pull up a loop, yarn over and pull through 2 loops. Repeat twice more in the same space. Yarn over and pull through all 4 loops on the hook.
Beginning cluster: Ch 2, work two unfinished dc in the indicated space, then yarn over and pull through all 3 loops on the hook.
Finished size
The sample layout uses squares blocked to approximately 20 × 20 cm (8 × 8 in):
- Blanket: 9 squares wide × 10 squares long, approximately 180 × 200 cm (71 × 79 in) before the border.
- Pillow: four squares for the front, approximately 40 × 40 cm (16 × 16 in), plus a crocheted back.
Make and block one square first. Your measurements will vary with your yarn, hook and tension.
Floral square
Make 90 squares for the blanket and 4 squares for the pillow front.
Round 1: Flower center
Make a magic ring.
Ch 1, work 12 sc into the ring. Pull the ring closed and join with a sl st to the first sc. 12 sc.
Round 2: Petals
Ch 3 (counts as first dc). Work 2 dc in the same st, then ch 1.
In each remaining sc, work 3 dc and ch 1. Join with a sl st to the top of the beginning ch-3. 12 groups of 3 dc and 12 ch-1 spaces.
Round 3: Cluster petals
Sl st into the next ch-1 sp. Work a beginning cluster in that space, ch 3.
In each remaining ch-1 sp, work a 3-dc cluster, ch 3. Join to the top of the beginning cluster. 12 clusters and 12 ch-3 spaces.
Round 4: Shape the square
Sl st into the next ch-3 sp. Work:
- First corner: ch 4 (counts as first tr), 2 tr, ch 3, 3 tr in the same space.
- In each of the next 2 ch-3 spaces: 3 dc, ch 1.
- In the next ch-3 space: 3 tr, ch 3, 3 tr for a corner.
Repeat the last two instructions twice more, then work 3 dc, ch 1 in each of the final 2 spaces. Join to the top of the beginning ch-4.
You now have 4 corners, with 2 dc groups between each pair of corners.
Round 5: Open mesh
Sl st into the first corner ch-3 sp. Work (sc, ch 3, sc) in that space.
Along the side, work:
- Ch 2, skip the next 3 tr, sc in the next ch-1 sp.
- Ch 2, skip the next 3 dc, sc in the next ch-1 sp.
- Ch 2, skip the next 3 dc, sc between that dc group and the next corner’s 3-tr group.
- Ch 2, skip the next 3 tr, then work (sc, ch 3, sc) in the corner ch-3 sp.
Repeat along the remaining sides, ending with a sl st in the first sc. On the final side, finish with ch 2 and join at the first corner instead of working that corner again.
Round 6: Square edging
Sl st into the first corner ch-3 sp. Work (3 sc, ch 2, 3 sc) in that space.
Work 2 sc in each ch-2 sp and 1 sc in each sc along the side. In each remaining corner space, work (3 sc, ch 2, 3 sc). Join with a sl st to the first sc.
Fasten off, leaving a tail for weaving in. Weave in the ends and block the square gently to approximately 20 cm (8 in).
Blanket assembly
- Arrange the 90 blocked squares in 10 rows of 9, with all right sides facing up.
- Join the squares using a mattress stitch through matching edge stitches. Sew the squares into rows first, then join the rows.
- Keep the seams relaxed so the blanket lies flat.
Blanket border
With the RS facing, join yarn at any corner.
- Round 1: Work sc evenly around the blanket, placing 3 sc in each corner. Join to the first sc.
- Rounds 2–3: Ch 1, work sc in each stitch around, placing 3 sc in the center stitch of each corner. Join each round.
- Optional scallop round: Skip 2 sts, work 5 dc in the next st, skip 2 sts, sl st in the next st. Repeat around, adjusting the spacing near the corners if needed.
Fasten off and weave in all ends.
Matching pillow
Front
Make 4 floral squares and join them in a 2 × 2 layout.
Back
For a simple solid back, make a rectangle to match the joined front:
- Chain enough stitches to reach approximately 40 cm (16 in) without stretching.
- Sc in the second chain from the hook and in every chain across.
- Ch 1, turn, and sc in every stitch across.
- Repeat until the back measures approximately 40 cm (16 in) tall.
Finish
Place the front and back together with their right sides facing out. Join three sides with sc through both layers. Insert the pillow, then join the fourth side.
For a removable cover, sew buttons or attach a zipper along the fourth edge instead.
Tip: Because the original stitch chart is not visible in the photo, make one square before buying all your yarn. You can add mesh rounds or adjust your hook size to obtain the square size and open look you prefer.
