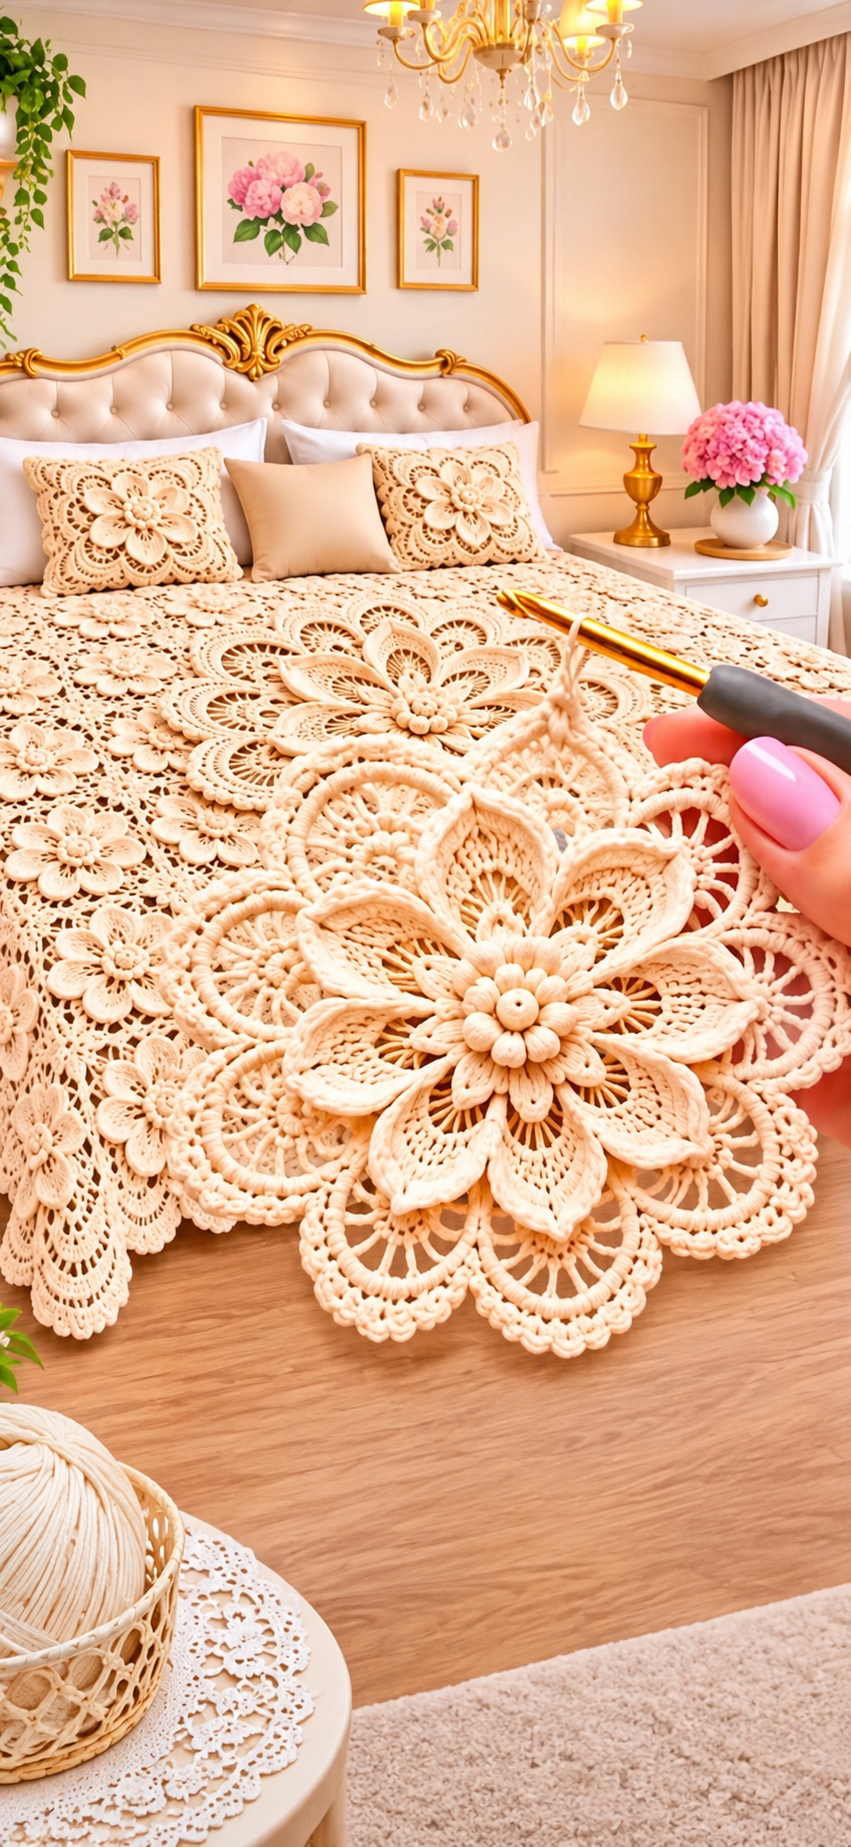

Create a beautiful, elegant, ivory-colored crochet bedspread featuring raised 3D flowers, delicate lace petals, circular medallions, and scalloped edges. Matching floral pillow covers complete the luxurious bedroom look.
Skill Level: Advanced Terminology: US Crochet Terms Finished Size: Approximately 220 × 240 cm (Queen/King adjustable) Yarn Color: Ivory, cream, or champagne
Note: This is a reconstructed, inspired pattern based on the image, not the original designer’s verified instructions.
Materials
- 3,000–4,500 g of fine cotton or cotton-blend yarn (depending on yarn weight and finished size)
- 2.5 mm or 3.0 mm crochet hook
- Tapestry needle
- Scissors
- Stitch markers
- Measuring tape
- Optional: Small pearl beads for flower centers
Crochet Abbreviations
- MR – Magic Ring
- CH – Chain
- SL ST – Slip Stitch
- SC – Single Crochet
- HDC – Half Double Crochet
- DC – Double Crochet
- TR – Treble Crochet
- DC2TOG – Double Crochet 2 Together
- BLO – Back Loop Only
- REP – Repeat
- ST – Stitch
- SP – Space
Part 1: Large 3D Floral Medallion
Round 1 – Foundation
- Make a magic ring.
- CH 3 (counts as first DC).
- Work 15 DC into the ring.
- Pull the ring tight.
- Join with SL ST into the third starting chain.
Total: 16 DC.
Round 2 – Flower Center
- CH 1.
- Work 2 SC into each stitch.
- Join with SL ST.
Total: 32 SC.
Round 3 – First Petal Foundation
- CH 5.
- Skip 3 stitches.
- SC into the next stitch.
- Repeat around.
- Join with SL ST.
You should have 8 chain loops.
Round 4 – Inner Petals
Into each CH-5 loop, work:
1 SC, 1 HDC, 5 DC, 1 HDC, 1 SC.
Repeat for all 8 loops.
This creates the first layer of rounded petals.
Round 5 – Raised Second Layer
- Working behind the petals, attach yarn around the posts of Round 3.
- CH 7.
- Anchor with SC behind the next petal.
- Repeat around to create 8 larger loops.
Round 6 – Large 3D Petals
Into each CH-7 loop, work:
1 SC, 2 HDC, 7 DC, 2 HDC, 1 SC.
Repeat around.
Gently shape the petals forward to create a raised flower.
Round 7 – Third Petal Layer
- Attach yarn behind the second layer.
- CH 9.
- SC behind the next petal.
- Repeat to form 8 loops.
Round 8 – Outer Petals
Into each CH-9 loop, work:
1 SC, 2 HDC, 3 DC, 5 TR, 3 DC, 2 HDC, 1 SC.
Repeat around.
The flower now has three overlapping layers.
Part 2: Decorative Lace Surround
Round 9 – Openwork Arches
- Attach yarn behind the outer petals.
- CH 12.
- SC into the next space between petals.
- Repeat around.
Round 10 – Lace Fans
Work into each CH-12 space:
3 SC, CH 5, 3 DC, CH 3, 3 DC, CH 5, 3 SC.
Repeat around.
Round 11 – Decorative Shells
Into each CH-5 space, work:
2 SC, 5 DC, CH 3, 5 DC, 2 SC.
Join with SL ST.
Round 12 – Picot Edging
- SC into the first stitch.
- CH 3.
- SL ST into the first chain to create a picot.
- Skip 2 stitches.
- Repeat around.
Fasten off and weave in the ends.
The finished medallion should have a prominent 3D flower surrounded by decorative lace.
Part 3: Small Connecting Flowers
Make smaller floral motifs to fill the spaces between the large medallions.
Round 1
MR, CH 3, 11 DC into the ring.
Join with SL ST.
Round 2
CH 4, skip 1 stitch, SC into the next stitch.
Repeat to create 6 loops.
Round 3
Into each loop work:
1 SC, 1 HDC, 5 DC, 1 HDC, 1 SC.
Round 4
Working behind the petals, create six CH-6 loops.
Round 5
Into each loop work:
1 SC, 2 HDC, 7 DC, 2 HDC, 1 SC.
Fasten off.
Make enough small flowers to decorate the connecting areas.
Part 4: Joining the Floral Motifs
- Arrange the large floral medallions on a flat surface.
- Position them in evenly spaced rows.
- Place the smaller flowers between the large motifs.
- Join adjacent motifs using CH-5 bridges and SL ST connections at matching outer lace points.
- Add extra chain bridges where needed to keep the fabric flat.
- Continue until the desired bedspread dimensions are reached.
For a Queen-size bedspread, begin by making one sample medallion and measuring its diameter. Calculate the number of motifs required based on your finished sample and the spacing between motifs.
Part 5: Elegant Scalloped Border
Round 1
Work SC evenly around the entire blanket, adding extra stitches at corners as needed.
Round 2
Repeat around:
SC, CH 5, skip 3 stitches.
Round 3
Into each CH-5 space work:
1 SC, 7 DC, 1 SC.
Round 4
Work decorative picots across the scallops:
SC, CH 3, SL ST into the first chain.
Repeat evenly around the border.
Fasten off and weave in all yarn ends.
Part 6: Matching 3D Floral Pillow Covers
For each pillow:
- Make one large floral medallion for the center.
- Crochet additional lace motifs to create a square or rectangular panel.
- Join the motifs using the same lace-bridge technique.
- Crochet a plain back panel to match the front.
- Join three sides with SC.
- Add buttons or a zipper to the fourth side.
- Insert the pillow.
Finishing Instructions
- Carefully weave in all loose ends.
- Soak the finished pieces in lukewarm water with a mild detergent suitable for the yarn.
- Gently squeeze out excess water without twisting.
- Lay flat and shape the lace arches and petals.
- Pin the openwork sections into shape if necessary.
- Allow everything to dry completely.
- Arrange the 3D flowers so they stand slightly above the lace background.
Final Result
A luxurious handmade crochet bedspread with dimensional ivory flowers, layered petals, delicate lace connections, and an elegant scalloped border.
Crochet Tip: Use fine cotton yarn and a slightly smaller hook for well-defined flowers. Block the lace sections carefully to achieve the refined, intricate appearance shown in the reference.
